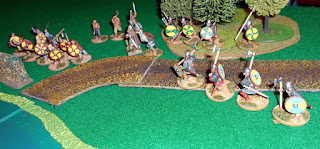
Getting some regular miniatures games in this year so far, and the most recent was a couple of weeks ago when myself and Paul had a classic Saga match up.
We played the River Grossing Scenario once again, with my 'new' vikings against his Anglo Danish force.
I had taken more quality troops than Paul, and so decided to concentrate them on one of the crossings, hoping to make a swift bridgehead, whilst holding the other approach as neutral until later in the battle.
 |
| Opening dispositions |
My left flank, facing the river ford, featured Besirkir, Hirdmen, Bondi and my Warlord, all thrown forwards early to try and rush the river; whilst the Anglo Danes held back a little further, which was what made me think I could jump the ground if I got the initiative.
The Anglo Danes were generally keeping their distance a little more, and I had a sense that though their left was weak, I would be better served breaking their right first and mopping up later.
 |
| Levies and Warriors on the AD left |
It is my eternal good fortune that I have far more facial hair than Paul, as that means I will always win ties in the roll-off for Saga. Thus I got the first turn I needed.
 |
| Lets get our feet wet |
My troops started splashing across the ford in significant numbers; looking to intimidate an enemy known for its' intimidation. This seemed to work, as Paul left a notable gap across the river for me to exploit. So I sent over some of my Hirdmen on what I expected to be a suicidal charge, but one I could support with plentiful reserves.
 |
| Over we go! |
In fact we executed great slaughter in the troops we met, thanks to the combination of additional abilities my battleboard offered. For no loss in my axemen group we whittled one of Pauls Huscarl units down to a lone man; giving us a valuable bridgehead.
My Besirkir followed up and unexpectedly survived an attack on a unit of spearmen, who collapsed in the face of such pressure. I was able to bring over my second line, whilst Paul had to draw troops over from his left in an attempt to shore up the breach.
 |
| Mid game |
After being tricked into manoeuvre rather firing on me thus far, Paul's left finally tried to push forward and shoot. This then placed them close enough for me to execute a charge. Safe to say that it didn't go so well...
 |
| Argh! Levies! |
Fortunately, the ford could not be going better and I now had far more troops on that side of river than Paul could handle. He was having trouble stalling my advance, whilst I had picked of more of his troops.
It was time for me the try and resole the Bridge, but Pauls' sling armed levy have proved to be a bugbear unit in the past, and today they were living up to this reputation. My Hirdmen were about to go into the meat grinder...
On my left I was able to bring over the last of my troop and block any options for Paul to break my overwhelming control of the river.
 |
| This land is ours! |
On the bridge though the result failed to go my way, the only benefit being that his unit of spearmen on the left had always been so low a priority amongst the fires he needed to contain, Paul had only moved them once all day.
 |
| Do we both constitute a Bridgehead? |
On his right Paul had burnt himself out against my numbers, and it was now in my interest to 'advance' (away from contact) into the hinterland of Paul's side of the river, making it hard, nay impossible to hit me before the game clock ran down. For his part, Paul's leader withdrew from the threat of my flanking Besirkir, frankly playing into my hands.
 |
| This smells like victory. |
And so after 7 turns, it was clearly in our favour. Not only did the Vikings hold the enemy ground, but we had also killed far more of the enemy than our own losses. The bridge was in our control but not in any way that actually amounted to victory points, still we gained many of those from the ford.
A great little game, though I feel we need some new scenarios to spice up the game. Possibly this is due to the limits of the core rules, possibly due to the limits of the models we have, either way after a couple of dozen games I feel like we've played through all the options more than a few times. This scenario I know I've played at least four times over the years, and yet to lose it seems.
Maybe it's time to try seeing if other scenarios are out there?


No comments:
Post a Comment