Thursday, April 30, 2015

Yeomen - A Conquest Games Mashup

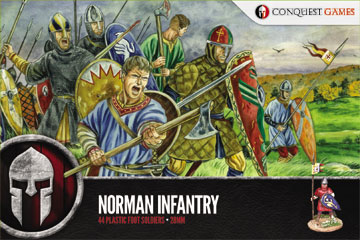
I was able to justify picking up a box of the Conquest Games Norman infantry for a fair price from my local model shop, I hadn't looked at them before, having no need for more Dark-ages models and not envisaging a use for them, but with the start of my Feudals I cast an eye over the models in the shop.  44 figures for £20 is great value, but what really tempted me was the composition of the poses:

A crammed sprue full of options
Three of the main poses and one of the command poses wore no armour at all, and in suitably generic clothing they would easily pass for 13th century levies.  Especially as I had a bag of spare parts from the Fireforge figures to add to the mix.

It was an easy job to slice off the shields from some of the arms and upgrade to Feudal ones, and by careful trimming of the otherwise useless Norman bare head I was able to make a sabot neck for the Fireforge heads (which have the neck joint fitted to the torso, unlike the Conquest models).  I equipped all the models with spears, noting that the Conquest arms adjoin the sleeve of the tunics in a rather vague fashion, but one that allows for a great variety of positions if you have the patience for the glue to set.

This only left the issue of every man having a sword as standard, rather a luxury for Yeoman levies in my opinion; so I cut most of them down so at least their lord had only provided short swords from available stocks.

Overall the net result looks fitting:

A mix of parts does the job!
I'm looking forward to painting these, not least as without armour they'll be fairly quick to do.  I can't decide if their lord would issue second line troops like these with livery, but the shields will certainly be in Hastinge colours.

So after not bothering with them for some time (I can't make an excuse to buy just every set of 28mm plastic figures, now can I?), what do I think of the Conquest models.  Quiet nice actually, like many sets from the smaller companies there are few basic poses with a decent range of optional parts; this gives a reasonable selection within one set.  the way the arms fit to the sleeves reduces the options in poses to an extent, but not so badly as to hamper the set greatly.  

For the competent converter there is obviously lots that can be done with this set to push it beyond Normandy, into its' past and future - I can see the models with the right spare parts working for periods from 500-1500ad in the right forces.  And this is without considering the armoured torsos in the set.  Obviously they cover their intended purpose well too.

This lot are destined for Lion Rampant, but some of the rest of the box will probably go to Saga units.  So, a satisfying set with loads of potential.  


Wednesday, April 29, 2015

Board-game Roundup


I certainly play more boardgames than wargames currently, simply because they are quicker and easier to arrange.  But I don't want to fill the blog just with them, this is notionally about wargaming after all.

Still, I do like to avail you of some info now and then.  One of interest played recently bills itself as a real-time time strategy game; Space Cadets - Dice Duel

Yes, Trek.
The aim of this game is for a crew to take on several functions in the crewing of a ship, aiming to destroy its' opponent whilst manoeuvring around an asteroid and nebula strewn starfield.


All this is done by the rolling of dice in real time, the dice allow different commands to be given, but only once the correct faces are rolled, and as there is no turn system you carry this out all the while trying to finish faster than the other side.

This results in chaotic and frenzied play, it's not a game for a quiet club environment as it does result in a lot of shouting (and laughter).  There is a battle for resources as well as to get your opponent in arc for a killer shot.  All told good frivolous fun, with a hint of strategy and tactics.

Next up, Splendor:

  
Splendor is essentially a set collecting game, based around being a successful gem trader.  It benefits from easy to comprehend gameplay that generates a deep puzzle for the players; what resources to choose and how to use them to attract the best clientèle.  It also benefits from extremely tactile, aesthetically pleasing components, most notably the poker chip styled gem counters.  


The game is not the most interactive I've ever played, it is essentially solo play in simultaneous competition with only the purchasing of a resource you had your eye on by another player impacting on your actions.  But it is attractive and easy to teach, and could certainly replace the dreaded Monopoly for a family game.  At less than an hour it does not out-stay its' welcome either.

For an amazing amount of tension in a tiny package, and no military metaphor that I can think of whatsoever, we conclude with Rhino Hero:

AKA Super Rhino
Don't write this off as a game for kids, as a Dexterity based building game it will work for all ages with a sense of humour and no inner-ear balance problems.  Players are dealt a hand of cards that function as floors, each with a floorplan on it.  You play a card building its floorplan then play moves on.  Sometimes a player will need to place 'Super Rhino' in the building in his efforts to save one and all.


The first person to get rid of all his cards, or the person with the least cards left of those players who don't cause the tower to fall down, wins.

For a game that takes all of five minutes to play, this was great fun, and one we repeated straight away.  Yes it is aimed at kids, but then so is that pub garden favourite, Jenga.  Though I doubt you'll see giant sized versions of this in pubs any time soon.

So three very different games, three very pleasurable experiences.


Monday, April 27, 2015

Perrywatch, Spring

I've been on my holidays, the last post was cunningly set to launch whilst I was absent.  Getting home I see the Perry's have finally updated their websites' work-in-progress section:

French HYW Infantry
So far as I can see this'll be the third version in plastic of these...
Whilst this is new, and should prove popular


The rumour mill has previously suggested British heavy light dragoons were on the way, I guess we will see (future Dean: Yes, they are now up on the production list), but I for one am very excited for the French infantry set above - it opens up so many possibilities.

I was also made aware of this via a friend, from Warlord:

warlord1
3-ups for Portuguese and clearly nearly ready French Chasseurs au Cheval
Unsurprisingly after Salute the news will trickle out with some regularity

Wednesday, April 22, 2015

Hastinge in Ireland - Part the First: A Messenger of War

King Edward was clear if not abrupt in his letter to Hastinge, 'Destroy the midges that swarm at our borders in Ireland, take thyself into the land of Ui Neill and come back with land and glory, care not for their tiny bites.  If you do fall afoul of their stings, there will be no reward for you to return to."

A thinly veiled threat alluded to the impatience Edward felt with the troublesome Irish, but with his main gave settled on the Scots, it would fall to the likes of Hastinge as his deputy to enact his wrath.

It was already understood by Hastinge that the forces of the Irish were dispersed and irregular, but of great number:

The Irish of Seamus O'Reagan - spot the deliberate mistake

And so it was that he would set off at first with numbers of his best men, Those knights who could provide strong horses, but not so many as their loss would weaken the whole, and both dismounted men at arms and infantry were raised to the cause.

The English - mostly old men, though Hastinge would not admit it
And so Hastinge began to enact his plans against the Irish.  Unbeknownst to him, Father Magnus of the border village of Bawnboy got word of the intended action through some of his parishioners, recruited to Hastinge's cause.  Magnus working as missionary to the free Irish over the border - far from the pagans that Edward and Hastinge portrayed to their men - decided to go to them with a warning of the attack to come.  He left his home and travelled the camp of Seamus.

Father Magnus
 Speaking his truth unto Seamus, the chieftain was raised to a fury and a grave fear, that the English may come upon him and his allies unaware; quickly Seamus arrayed a host of men to escort Magnus to his own king with news of the threat, as it was travelling back through Bawnboy.  At which time the scouting party of one of Hastinges detachments spotted them.  And so an encirclement began.

Seamus is to the North, with the English West and East
O'Reagan needed to get his men - entirely on foot - to the south, and could at least count on one of the few better packed trails in the marshy land he called home to follow.  It led through open farmland, heath and sparse woods to the village of Bawnboy and beyond, should he get this far he could send runners ahead to warn his king of his arrival, and stand a chance of making it before nightfall.  Bawnboy itself seemed too small to hold all his men in safety for the night.

 
But as he began to approach, the Eyes of Welsh bowmen watched his every move. The Irish made slow progress, sensing danger.

Spearmen dash for the village.
Hastinge's welsh scouts acted with initiative, the bowmen believing they could pick off the enemy from a distance whilst their Spear blocked the route through the village.  Meanwhile, to the west, Deputies for Hastinge, led by Guillame the Rash advanced hurriedly.

Irish skirmishers hurled a welcome of javelins
 The Irish seemed in a state of confusion, their lord and his armoured host were far to the rear with Magnus in their company, before them wild Irish rushed this way and that diverted by sight of the English.

Welsh spears enter the village
 Irish Kern's rushed the Welsh in the village, who formed a shield wall to receive them.  Blades bit Hastinge's men, but not so hard as the break the line, whilst spear-points extorted a severe price for the thin gruel the Irish tasted.  With heavy losses the Irish fell like autumn leaves, and the few survivors ran in panic.


 But little different was the experience of Guillame's men at arms, attempting to bring the Irish to battle, their skirmishers deftly avoiding attack.  A sharp fight broke out between the Kerns and the knights, which the men of armour won well enough, but the losses of several separate engagements were already telling upon them, with wounded and dead left on the field.

 
 Bill and glaive armed sergeants came up to support Guillame, but when the last of his companions fell to a well aimed spear, he lost heart in his cause and was away.  Such cowardice was seen by all, and short would his tenure in command remain.

Pardon his French
 Rather the Welsh wing of Guillame's troops tried to uphold Hastinge's honour, advancing on the remaining Kerns of the force.  Their bowmen moving to a ruined farmhouse in the village awaiting a chance to strike at Seamus himself.

Spear & shield worked last time, but wasn't our formation better then?
 O'Reagan by now had slogged in heavy armour halfway across the fields, with his pious charge in tow.  Only now did his men come into the range of English spite, and a harrying rain of arrows blighted their advance.
Probably handy to have a priest for last rites at least...
 But his light infantry made use of all their skills, dispensing with the English cleavers around the village.  Soon only the Welsh bowmen and a rearguard of men at arms on foot were left to stop Seamus, and the situation looked bleak for the English.


 Irishmen began to encircle the knights.

Surprise!
 But they used their armour well, and were not swayed by the presence of the enemy.  They were fortunate to draw them out into open ground, and were able to drive the Irish back, allowing the bowmen time to withdraw from the now untenable village.

 
 But soon there were more javelins and more infantry than the men at arms were willing to face, and they too withdrew the field.  By this point it was impossible for the Welsh to stop the progress of O'Reagan, and so they too left the field.

Time to go boyo's
Victory on this day at least, would go to the Irish; and doubtless there would be no swift defeat of them now their king would be aware of the action against him.

Both sides would lick their wounds from this first encounter, and each arguably had learnt much, the English old guard seemed soft from years living amongst the Irish rather than time on campaign, and Hastinge vowed to recruit more fresh troops from his Welsh homelands.  Whilst the Irish gained a healthy respect for the might of armoured infantry, but also knew that their lightest troops could take the fight to the enemy on any ground.  But it was clear at this time that Hastinge would do all he could to keep the news from his lord of how the campaign had opened.

______________________________

In terms of Glory, The Irish gained 5 points for completing the mission, but lost 2 points from unfulfilled boasts  - as my leader scarpered mid battle, they were unable to challenge or defeat him in a duel!  The English gained one point by defeating an Irish force before it lost any of it's own, but failed in it's other two boasts, and so ended up in a deficit of points.  At the end of part one of the campaign therefore the results are:

Ireland: 3     England: -1


Oh dear.


Sunday, April 19, 2015

The Campaign of John De Hastinge in Ireland - Introduction


For Lion Rampant I am working on an English Feudal army, whilst my erstwhile opponent Paul has been adding some models to his Saga Irish to give them Feudal leadership.  It did not take us long to come to an agreement that as the rules allow for flexible armies, and as we'll both be sticking to the same forces for at least the next few games.  It would be a good idea to turn these into a loose, narrative, campaign.

Now obviously when I say narrative, I guess as I'm running the blog, it'll mostly be narrated from my end, and I will have to ensure that bias doesn't slip in too much.  Though, where would we or our forebears be without propaganda?  The aim is to play maybe 6 games over the next few months, and to use different scenarios for each, keeping a record of glory points as we go.  The final battle will be a bloodbath with the previously accrued glory points offering some form of bonus to the leader; ultimately victory on that day will go with he who has the most glory, so long as he outlives his opponent!

And so, who will lead these bands of men?

John De Hastinge - Baron Bergavenny

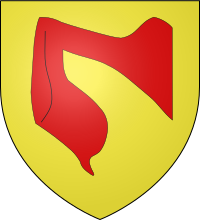
The coat of Arms of  Hastinge
A long-time campaigner who fought in the wars in France, Scotland and Ireland, John was the archetypal hard fighting knight, with little of the chivalric about him (think more like the English in Braveheart than the English in Ivanhoe).  John lead a retinue under his colours of Or and Gules, comprising a few knights always for want of good horses, and infantry - drawn mainly from his Welsh homeland.

Seamus O'Reagan - Chieftain of Lisnaskea, Ui Neill

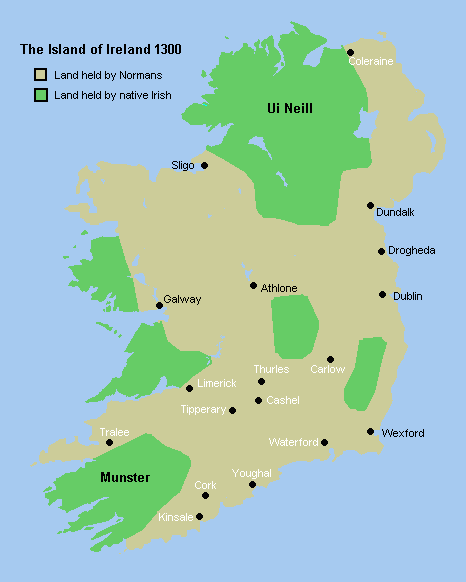
Little is known about this enigmatic character, who appears to be the leader of a troublesome clan on the border of Norman Ireland in the late 13th century.  What is known comes from the troubling records of petty feuds and a punitive campaign led by John De Hastinge in 1297.  Seamus led a personal warband of native Irishmen, mostly fighting without armour or footwear, but a great many with fearsome axes and a knowledge of the land second-to-none.

Thanks Wikipedia

For the King it would please that John eliminate the constant threat of raiding and ambush from the border lands, and if possible bring god and taxes to the heathens.  For Seamus his way of life and liberty was at stake.

Who would achieve the will of their god, let the records now be opened and their tales be told...


Thursday, April 16, 2015

Format Refresh

I'm in the process of adding a couple of new features to the blog, and you may already have noticed the new tabs running across the top of the page.

The main development at this stage is a compiled list of all 28mm plastic historical miniatures, currently and previously available.  Hopefully this will become a one-stop shop of information and links; and will include suitable fantasy pieces that can serve a second life, as well as those items made specifically for historical gaming.

Over the years I've followed the development of this part of the hobby with great interest, and bought a great many of the available sets (some just to see what they were like!), so I will include links to my own reviews on the page as well as to the retailers and such.  I hope to dig up more on foreign rarities, useable toy's and out of production items too as I go.  For example these Russian 28mm GW clones from Technolog (which you can only get in the UK if you are prepared to buy wholesale - a bit of a gamble?)

Teutonic knights and Medieval Russians from Technolog


I hope it will become a worthwhile resource...

Sunday, April 12, 2015

A painting quicky, a Medieval Monk


Intended for some of the missions in Lion Rampant, but would probably perform the same functions in Saga, or even Hail Caesar; I knocked this chap up pretty quickly - well, it's not hard when all you wear is a brown habit.

This is a Perry miniatures model from their Crusades range.  Suitable for most medieval periods I think however.

Appropriate for a Sunday I guess...


Saturday, April 11, 2015

47e Regiment d'Infanterie de Ligne

It took a whole three months, I'll say it again, Three months, to finish this unit; I thought they might be quick - what with having a number of greatcoats and all - not so.  Time is a resource I have little of for painting presently, and with other distractions such as mediaevals rearing their head during the process, commitment to completion only got worse.

Still, now they are ready for battle.


The 47e fought throughout the peninsular until 1812, standing at Vimiero, Salamanca and Vitorria amongst others.  This unit was pulled together from a variety of, at the time, leftover models and so features a mixture of Perry, Victrix and Hat Industrie models.

My painting still isn't back to what I could once muster, but in part I think this is actually down to a new lens prescription and the ravages of age setting in.  How much longer I can fend off the varifocals is anyone's guess (sigh).


It's a relief to finish these, as I think I'll be in need of every Frenchman I can muster come the summer, as there is talk of some form of anniversary fight to mark Waterloo.  I don't think we can do it on a grand scale, but something to mark the event will be possible...

Thursday, April 09, 2015

Tabletop Teaser - Mercenaries

Inspired by a rather enjoyable Wargames Illustrated issue on Mercenaries I thought I would prepare a suitable scenario for just such a situation...

Introduction

Allies in battle, whether tied by treaty, subjugation, duty or the promise of fortune; cannot be relied upon.  Most of the time such arrangements will hold, but there will always be cases whereby this arrangement does not deliver the results hoped for.  At Sekigahara (1600) the troops of Kobayakawa were turned by spies and negotiation against their former friends.  At Bosworth field (1485), the Stanley's held back from engagement until they could decide who it would be most advantageous to support.  Whilst at Lepzig (1814) Saxon Divisions changed side mid battle, turning on their former masters.

This scenario attempts to provide a degree of uncertainty to both sides as they attempt to defeat their foe in a civil dispute, each has unknowingly been in negotiation with the same mercenaries to aid their cause, who, if any will the mercenaries fight for; and who will be victorious?

Ground

Dashed lines indicate initial deployment dispositions

A wide plain used as common land lies between the two armies.  A small town is to the west of this and narrow track-ways led to the east down the middle of the field until they are diverted by a long ridge line that dominates the eastern edge.

Red deploys his forces to zone A and Blue to zone B; each anchoring his position with a patch of woodland on their right.  There should be at least half the width of the battle field between the two sides at deployment and neither may deploy troops beyond the track ways eastern side.

Period

With suitable adjustments to terrain and forces this scenario could be suitable for any period.  It is presented here with pre-gunpowder weaponry in mind, but would be easy to adapt to Pike and Shot or later periods.  Small forces and similar equipment should permit players to divide a single force to represent the armies if needed, should a suitable civil war force not be available to them.

General Outline

Red and Blue represent opposite sides in a civil dispute, which may range from the trivially regional to the nationally historic.  Each side has met the other on a neutral field for a clash it sees as critical to it's cause, and has assembled their available forces.  Both sides have also been attempting to sway the allegiance of hired troops from a neighbouring region that has remained neutral.

Blue Force

Blue will have the following core force:

  • One Unit of Heavy Cavalry
  • One Unit of Light Cavalry
  • Two Units of Medium Infantry with long-ranged Missile Weapons
  • Two units of Medium Infantry with spears and shields
Additionally they have 500 gold coins with which they may:
  • Either attempt to buy the services of the Mercenaries by specifying any sum of money, or
  • Buy a single unit of Heavy Cavalry for 400 gold
  • Buy up to two units of medium foot troops (either type) for 200 gold each, or
  • Buy up to three units of skirmishing light infantry for 100 gold each
They need not spend any of this money.  It is uncertain what troops the Mercenary Gold force may bring to battle, but they are known as mighty and usually mounted warriors.  Blue should understand that the mercenary force is likely to be half the size of his own.  Even if they do not spend any money on the mercenaries, they will be able to parley for their support before the battle, but bear in mind, money talks!


Red Force

Red has the same initial troops and decisions as detailed for Blue above; it is given the same briefing.

Gold Force

The Mercenaries will arrive with the following troops:

  • Two units of Heavy Cavalry 
  • Two units of Light-medium infantry sword/axe-men
The mercenaries will not arrive on the field until the start of the first players second full turn; then appearing along the crest of the ridge line at 'C'.  The mercenaries should be controlled by the umpire in line with the guidance below.


Playing the Game

Give each player their briefing and ask them to choose how much money they wish to use on Mercenaries or additional troops. Once this is determined have each player roll 2D6; to this roll add one for every 100 gold spent on the mercenaries (rounding down if required).  This will give a result of from 2 to 17 on the table below:

  • 2-7 - They are offended by the offer made and will not fight for the party.
  • 8-12 - They consider the offer fair but are unsure of the party's ability to win, they will join its' cause only once it has destroyed more of the enemies units than it has lost (so it would join at 1-0, 2-1, 3-2, etc. as befits circumstance)
  • 13-17 - They are heartily impressed and will directly support the parties attack as soon as they arrive the field.
But; if the results for both Red and Blue fall in the same range, the mercenaries will not fight for either and will leave after observing 3 full turns of battle.  

The only other exception to any of the above being that if either Red or Blue blinks first and attempts to attack the mercenaries (shoots at them or declares a charge against them, moving towards them would not be enough), the mercenaries will turn on that side for the rest of the battle.

Once mercenaries commit to the battle they will do so enthusiastically for whichever side their programmed result favours.  The umpire should seek to use them in a reasonable, but aggressive, fashion; until such a time as victory is won or lost (see Winning The Game, below).

As far as Red and Blue are concerned, they are told none of the above, rather refer only to the result of the 2D6 roll; If it is even then inform them that the negotiations have gone well, and can expect matters to go their way. if it is odd tell them that the negotiations have gone badly, and that they cannot assume any support.  This may very well not reflect the true course of matters!

Each player will then deploy their troops.  The preferred method for doing so will be by indicating their dispositions on maps - then placed by the umpire.  Other methods such as deploying alternate units may also be acceptable.


Winning the Game

The battle lasts for 6 turns for each player, subject to the rules conventions used.

The game will be won or lost otherwise by conventional means, typically, whichever commander destroys more than half of his enemies units, may declare himself victor.  Mercenaries do not count towards this loss, but if they lose half their units, they will independently withdraw.  You may wish to count army commanders as units for the purposes of determining over half- subject to rule sets.

If both sides lose over half their force, it may be considered a pyrrhic victory for whoever is ascendant.   If both sides have over half their army left after 6 turns it may be considered a draw as each is in a position to pursue the campaign further.

Notes

The key to this scenario is uncertainty.  Neither Blue nor Red should be certain of when or indeed whether the mercenaries will appear and if they do, whose side they are on.  This will possibly make either player jumpy enough to launch a pre-emptive attack!  Not a wise course of action.

Whilst the scenario as written assumes largely identical armies, it would not be unreasonable to use differing forces built to an equal points value.  In this case it is suggested that Warhammer Fantasy/Ancients forces of 1500 points may form the core, with an optional 500 points to spend either on additional troops or on gold coins (at an exchange rate of 1 to 1) to buy mercenary favour.  In such a case the Mercenaries will have a combined value of 1000 points.  For DBMM a core force of 150 with 50 optional points and a mercenary force of 100 points may be more appropriate.

These ratio's (3/4 core, 1/4 optional and a Mercenary force of half the sum total of the player points) should permit the mercenaries to be a tempting proposition, but one the players may elect to forego.


Sunday, April 05, 2015

Agincourt 1415 - The Battle Refought & Thoughts

All deployed we began the battle.  James T was commanding the French once again, with me taking the subsidiary role of French cavalry commander; whilst Paul and James S divided duties for the English.

JT decided to try to do what the French had not on the day, and advance the infantry under cover of the crossbowmen.  Recognising that the narrowing of the battlefield would hamper any progress we initially agreed to see what the first line could do, and then elect to try and bring the cavalry through the lines to finish the job if they were not enough.  This would require careful traffic management.


The French bring all their crossbows through the lines, whilst the cavalry close up.  I elected to play the knights of Vendome and Dammartin as aggressively as possible, and so on the third turn - by which point the French had otherwise advanced but little, and the English not at all - Vendome's right made a charge against Camoy's left, hidden in the trees.


The English bowmen were caught off guard and scattered back into the trees (double one on a break test) never to return.  The knights meanwhile were enfiladed by fire from the English wedges and forced to retire with heavy losses.  But their success spurred on the left wing who attempted to charge between the stakes and in to the English billmen.  They came up short.


The harrying fire into both flanks savaged the charging knights, and they broke in panic.  By now The Constable of France was advancing his men at arms, screened by a supported line of crossbowmen.


Failed orders and the narrowing of the gap caused no end of problems for the French, Dammartin at the rear started to organise his men at arms into deeper reinforced lines, with less frontage.  Vendome rallied his remaining knights, whose retreat had further disordered French lines.  Now the counts crossbows approached shooting range to the English.


From the forest, the men of York watched the advancing mass warily, yet they kept up a steady rate of fire into their lines.


Though in this units' case to virtually no effect, by quirk of the dice, their shooting repeatedly proved devastating to knights and men at arms, but utterly ineffectual to lightly armed troops.  It was soon agreed they had only been issued with armour piercing arrows, and when faced with unarmoured troops they did not know what to do!

By now the French were becoming more spread out, but their front line was closing on the English.


the arrow storm was thinning their numbers but not yet stopping the advance.  Vendome's rallied knights threw themselves on to the stakes of Camoy's remaining bowmen, as a vanguard of glory for the dismounted men behind.


They pushed the bowmen back from their stakes, but this only allowed the English to gain the support of their infantry, and this broke the exhausted French, sweeping away Vendome with his shattered knights.  The French lost some time as a result, but heavily armed men on foot would next take on the English.  King Henry remained confident despite the weakening of the defences on his left.


Due to disorder though it was the centre and his right that came under pressure next as the Constable began to exchange shots with his foe, and formed supported lines of men at arms and infantry behind with the aid of Alencon.  Half of his crossbows retired in panic from the English, but he was able to keep a screen ahead of his men, and this was proving vital.


Finally Men at arms struck Camoy and Henry simultaneously, Camoy's men being routed in a short brutal attack, when a thousand men at arms came upon them.  In the centre Henry had little more than two hundred of his own, but he threw his lot in with them and hope to fight off double their number of Frenchmen in full plate carrying great-swords and staff weapons.  Naturally I made Henry a +3 commander, with the attendant risk that held; but this proved vital to this fight, and the impetuous French were repelled with great loss.


There was no time for celebration though, as another two to three thousand French fell upon York's right wing moments later.


The English were forced back from their stakes again, and from the fringes of the wood, this time the weight of numbers favoured the French and the isolated English in the wood soon fled.  With his left broken and his right on a knife edge things looked to be all over for Henry.  A final coordinated attack now came in from the centre.


Here the wedge formation of the English, behind their stakes, saved the day, but the inability of York's men to support one another gave up the right.  Dammartin's cavalry finally had made their presence felt, but the impression they made was slight, a thousand of them being routed in short order, before the second line was sent in to restore some honour.

As a final ignominy, Ysembart and his peasants had occupied the English camp, and began to pillage all within.

At this point it was clear the French were victorious.


But as I had been keeping records, it was in fact closer than the English commanders realised.  Both the Constable's and Alencon's divisions were on the very edge of collapse - each needed only one more shaken or destroyed unit to become broken, and given all the attacks they put in were combined attacks from both commands this could easily have happened.

The English scarcely moved all battle, doing no more than using their infantry as a reserve.  Whilst the French had much ground to cover.  Some infantry inevitable got left behind, as they fell out of command range for divisional orders, and became less crucial to the overall plan.  In event JT's decision to lead with the crossbowmen was undoubtedly the correct one, and gave them the best possible chance of victory.

But should it have been that easy?

So far as accurately reflecting the numbers and dispositions of the day, I was happy with the forces, so far as the result, not so sure.  There were too many units for the French, resulting in too many targets for the English to try to take down, and they were too disciplined and orderly too.

For balance in any subsequent refight I would do the following:


  1. Although I would not reduce the numbers of models/men involved.  I would turn the French into Large - even Huge units with higher combat values and stamina, but less control.  This would give the English fewer targets to consider, and make the French line less mobile.
  2. Reduce all the French command ratings by one.  The English were command 9, but didn't need it.  The Constable was also a 9 but Alencon and Vendome were 8's and Dammartin a 7, these allowed for too many successes.  As a side note the French commanders were only rated +1 in combat, whilst the English were +2 or +3.  As it was only Vendome joined a melee for the French and it didn't change the result.
  3. Give the French knights and men at arms the Frenzied charge rule, so that they insist on pushing the crossbows all the time, combined with the Eager and Drilled rules this would keep the French advancing and make it so much harder for the lead line to be held back.
  4. Increase English bow shooting to 4, at long range only.  This would add to the affect of the massed plunging fire of volleyed arrows, but at short range the instinct to slower aimed fire will kick in.
These changes I feel would make for a more realistic recreation of the events on the day, without deliberately misrepresenting the numbers of troops involved.  As far as the game as played though, all involved enjoyed it immensely, and we drew many favourable comments from the rest of the crowd present on the day.

All told a great success, just not for the English.  I envisage on this basis Shakespeare's 'Henry the Fifth' would have involved a final act with him delivering a sad soliloquy from a French dungeon, awaiting the payment of his ransom; conditional on surrendering his claims to the crown of France.

Now that is a very different outcome.