
To be honest, the parts are at the practical limits of moulding, with some of the larger bits being slightly, but noticeably warped. It's fair to say Games Workshop have mastered this technique - and although it's an admirable start, Warlord games have a way to go.
Although the parts are modular, in so far as they are not specifically fixed in set up, they really only work in a limited number of ways. The farmhouse itself is more or less a standard layout.
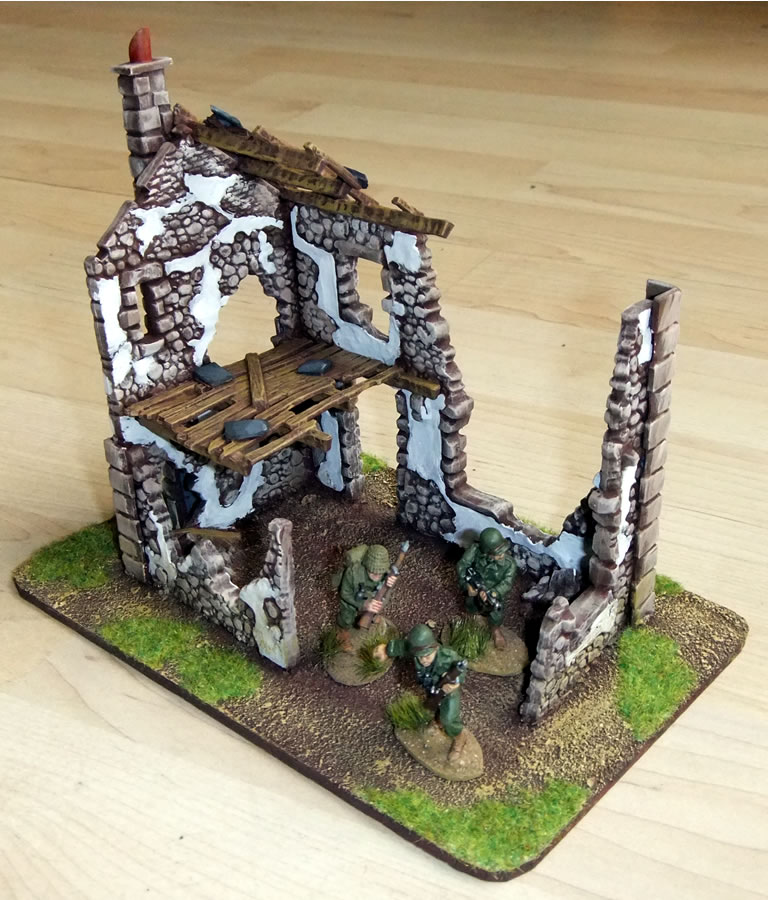
The US infantry give a sense of scale, it isn't massive, but it's a reasonable size. The model could be expanded with the smaller parts of course, but these mainly serve to make the footprint of a second building:


As to the painting, well the models are ideal for drybrushing techniques. To get these licked out so quickly I started from a brown craft acrylic base, building up the stonework in layers of lighter browns. Then I did the plaster with two layers of light grey then a highlight of white. The wood was then done with lighter browns before doing the tiles (made from spare corner pieces) and chimney pot.

The bases were part of the basic assembly and sanded before undercoating the models. Therefore the brown base colour allowed them to be finished with minutes of drybrushing and a layer of flock.
Overall the models look great finished, and probably justify the normal £15 price tag - if you are in the market for precisely this model. Personally I prefer it to the MDF kits I did a few months back, but on the other hand there really is only this model so choice is limited. I wouldn't want another one!


It looks like a nice terrain piece to me and you managed to do it in a small amount of time. Definitely worth considering.
ReplyDeleteGreat looking ruins!
ReplyDeletePhil.
That is lovely work!!
ReplyDeleteI love the paint job you did on this - but even more so, I am totally digging the base work.
ReplyDeleteWhat did you use for the base? MDF?
Yeah Mech, the bases are MDF, though these days my main source for this sort of wood is the damaged leftovers they make available for free outside of IKEA stores! The thinnest MDF type board at this scale makes for a good sturdy base but can still be cut with a craft knife and a steel rule. The bases were gritted with bird tray sand from a pet store before being undercoated the same as the whole model, the rest of the technique is as described above.
ReplyDeleteAki, thanks for taking the time to reply!! You mentioned the thinnest mdf, but how do you stop it from warping when the glue goes on?
ReplyDeleteMech, in my experience, the wood glue has not warped mdf of the 2-3mm thickness. This does come with a proviso that I tend to thin the wood glue and add a spot of dishwash soap to make it flow better. Perhaps this reduction in its' viscosity avoids warping, I don't know but I expect the MDF itself having no specific grain is more than adequate to resist warping.
ReplyDelete