Monday, April 08, 2013

Warlord Games Ruined Farmhouse

No hanging around!  As the parts for the Bolt Action starter set ruined farmhouse are supplied pre-clipped from their (presumably basic) sprue, I assembled them quickly and was able in less than a couple of hours to paint them entirely:


To be honest, the parts are at the practical limits of moulding, with some of the larger bits being slightly, but noticeably warped.  It's fair to say Games Workshop have mastered this technique - and although it's an admirable start, Warlord games have a way to go.

Although the parts are modular, in so far as they are not specifically fixed in set up, they really only work in a limited number of ways.  The farmhouse itself is more or less a standard layout.
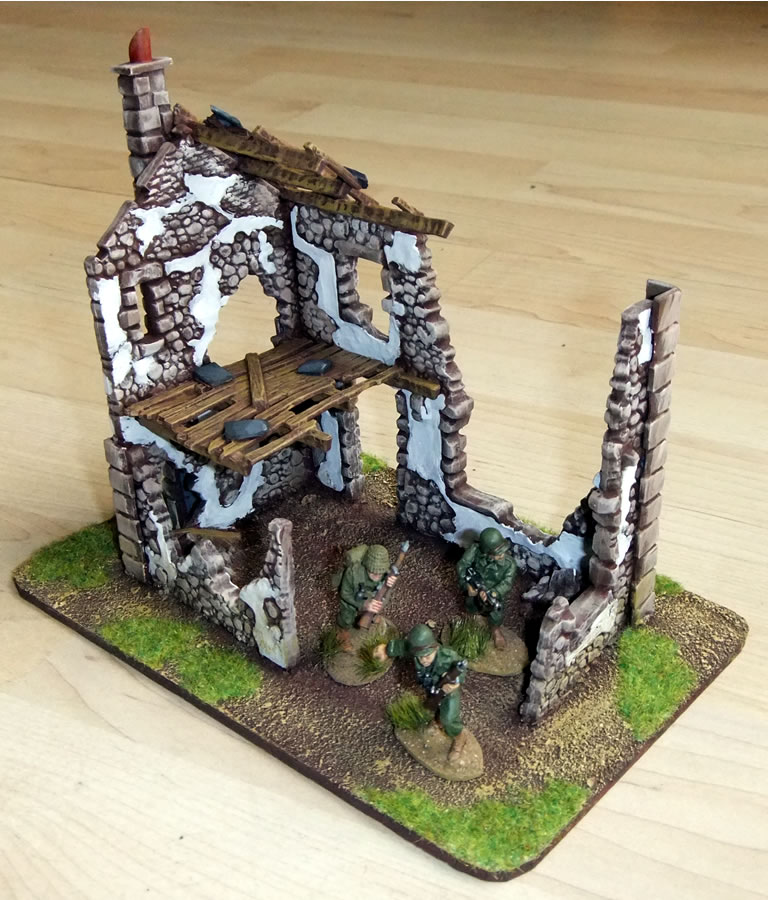

The US infantry give a sense of scale, it isn't massive, but it's a reasonable size.  The model could be expanded with the smaller parts of course, but these mainly serve to make the footprint of a second building:


As to the painting, well the models are ideal for drybrushing techniques.  To get these licked out so quickly I started from a brown craft acrylic base, building up the stonework in layers of lighter browns.  Then I did the plaster with two layers of light grey then a highlight of white.  The wood was then done with lighter browns before doing the tiles (made from spare corner pieces) and chimney pot.


The bases were part of the basic assembly and sanded before undercoating the models.  Therefore the brown base colour allowed them to be finished with minutes of drybrushing and a layer of flock.

Overall the models look great finished, and probably justify the normal £15 price tag - if you are in the market for precisely this model.  Personally I prefer it to the MDF kits I did a few months back, but on the other hand there really is only this model so choice is limited.  I wouldn't want another one!

Friday, April 05, 2013

Bolt Action - Assault on Normandy Starter Set


Karma may be trying to tell me something, I dunno, but I've been gifted a Warlord 'Bolt Action' Starter set from the Headingley Games Club.  As Warlord loves to promote its' products to clubs, they had received a starter bundle, and as the clubs active 28mm WW2 player, and scenery builder it was passed to me to do with as I see fit.

The contents (which retail for £60 ordinarily) are pretty good:


There's the rule book of course, but also 40 plastic figures, bases, a ruined farmhouse set and some of the Bolt Action orders dice.  Overall the separate price for all the items would be around£75-80 so as an entry into the system it represents reasonable value.

I'm yet to decide what exactly to do with the contents; I already have a set of the rules, and have no need for terrain, so both of these items are likely to end up back in the Headingley club, once they've been prepared for the club of course.  On the other hand, by using the models I can expand my own collection, and present demonstration games at the club for interested parties; and for this the dice will come in handy...

Decisions, decisions.  Nice to have this one to make.

Tuesday, April 02, 2013

1st Battalion, 2eme Leger - And more...

There was a lot of industrious painting in March, with the aim of increasing my forces for the refight over the Easter weekend.  I felt it essential to add at least one French unit to my forces for the game, and so I set to a recent purchase of the Hat Industrie 28mm Plastics:


One box of Marching light infantry and one pack of the Command set provides enough models for two battalions and spare figures to support other uses.  64 figures for about £20 is the best value out there, and the figures are really not too shabby!  My only reservations about the Hat models are that they are moulded in a lurid blue, that could challenge some modellers sensibilities, and the plastic itself is very tough - hard to cut and so opportunities to convert models (other than with paint) are likely to be minimal.

Size wise they maybe stand a millimetre or so smaller than Perry miniatures, and another mil less than Victrix, but it is the physique that is most distinctive.  Slender fellows these, they are well proportioned but the fine detail may not appeal to all, and they will not mix and match terribly naturally with the other major manufacturers.  Within their own unit however they'll look fine, so it's handy that Hat provide models for all the main requirements.  Additionally, the mounted officer is a nice touch, on a very pleasant horse.


Whilst pottering about with my Napoleonics collection, I revisited my War of 1812 models.  They admittedly spend more time nowadays impersonating Portuguese infantry, but that will change in time. I found a spare cannon to provide their artillery crew with something to do:


And then I added a couple of Officers to their host from the bag of bits.


Whether the Americans will ever really be used for anything is an open question.  One thing that is clear at the moment is that I am rationalising my collections quite savagely at the moment, and steady sales of items I no longer want are making space for the items that I do.  The Napoleonics collection is absolutely safe in this regard however.

The same can't be said of everything else...

Monday, April 01, 2013

Two Saga battles

There continues to be plenty of Saga action in my gaming activity of late, indeed, it seems best to try to catch up somewhat and conflate two separate games into one post today.  The first game was to introduce Martin at the Sunday venue to the rules.  Hence we actually played a couple of scenarios from the book using my Vikings and Normans.  In both games I gave Martin command of the less complicated Vikings.  Having led them to victory in the first game, he set up for the second brimming with confidence.


Using only small four-point forces we played out the river crossing scenario.  Initial Norman Aggression in trying to cross the ford proved fruitless:


However, my Norman foot troops would save the day, units of Crossbows providing excellent punch, especially when combined with long range fire.  By the end of the game, the Vikings had been cleared from the ford and the bridge, and my Spearmen were able to advance into enemy territory with impunity.


A few days later and I had another game arranged with Paul, at the Thursday venue.  We played a larger 6 point game, to the simple Warlord scenario, this time my Normans were facing his Irish.


The Irish seemed most comfortable hiding in cover, and so moved rapidly to the trees and hedgerows...


My Normans looked to outflank the majority of his force. hoping to find a weak spot.


Paul's war dogs were dispatched easily enough, and my combined fire power was enough to keep the enemy contained.


Thus the Irish were limited mainly to throwing Javelins from cover, though this was an effective tactic, especially against my horsemen.


However I surprised him on a couple of occasions by charging into the woods and picking off Irish warriors.  Elsewhere my heavy troops considered the options of entering the fields to the flush the Irish out.


But in the end they erred on the side of caution.  Simply too many Irish for them to take on alone.  My Warlord was more concerned with survival and picking off the isolated troops left in the open.


In the end, as neither warlord was killed, it came down to other losses.  At the time I totted it up wrong and concluded I'd won by a couple of points; but actually I think I'd forgotten to count some of my warriors separately, and it was in fact - so far as I could tell - a draw.

So 1-1-1 over three games.  Which seems fair.

Saturday, March 30, 2013

The Wicker Man - Angelsey 60ad

We attempted a big game of Hail Caesar at the club a few weeks back, my late posting is due mainly to personal matters resulting in me putting the blog very much on the back burner of late.  But I digress; with so much time passed since the event, I'm not going to attempt a lengthy narrative of the battle, but the aim for the Romans was to make it to the Wicker Man in the centre of the battlefield and stop the pagan cults that would give so much psychological advantage to the Celtic hordes.  Myself I played as the Celts, one of several commanders who found our troops to be far from enthusiastic for the coming fight.

Initial dispositions.  Also pretty much final dispositions for some of the Celts!

Rome began from a very limited deployment, but had the advantage of effective command

Some Celts advance, but scarcely enough to worry the Romans

None of which serves to stop the Roman advance

There was no denying the threat of the Celtic masses.  But it was all bluff and little bluster...

Celtic cavalry led the half-hearted early attack

The Richards, one for each side, fought out the bulk of the action in front of the Pagan effigy.

The rest of the Celtic army remained reticent, happy to watch its cavalry being destroyed.

A small number of light troops began to reach the Roman lines, and one in particular case, humiliated the Praetorian Guard in a protracted engagement.

Slowly the extreme right flank of the Celtic army advanced on the Romans, who were closing on their target in the centre.

Finally, rashly, the Celts on the right charged the Roman line they gambled may be over extended. The lead Roman elements proved to be; but the second line fell on the Celts and destroyed untold numbers.

With time short, the Celts arriving late did at least save their numbers from greater loss. The Romans arrived too late at the flaming statue; an effective draw.
A game hamstrung by a lack of time; sharing billing with the club AGM, we only had a couple of hours for game play; another hour would've helped loads but the poor command rolls of the Celts meant they never really stood a chance of getting involved before Rome was in a position to beat them with ease.

Wednesday, March 13, 2013

A Rare Outing

I realised as I prepared for this game, that it was my first Warhammer battle in around four months.  
[This section of text has had to be removed, due to adverse reaction].

Presently there is only one player who I enjoy games of Warhammer with, as he is not of a competitive leaning,  my infrequent games of WFB seem to be at Jason's welcoming abode alone presently.

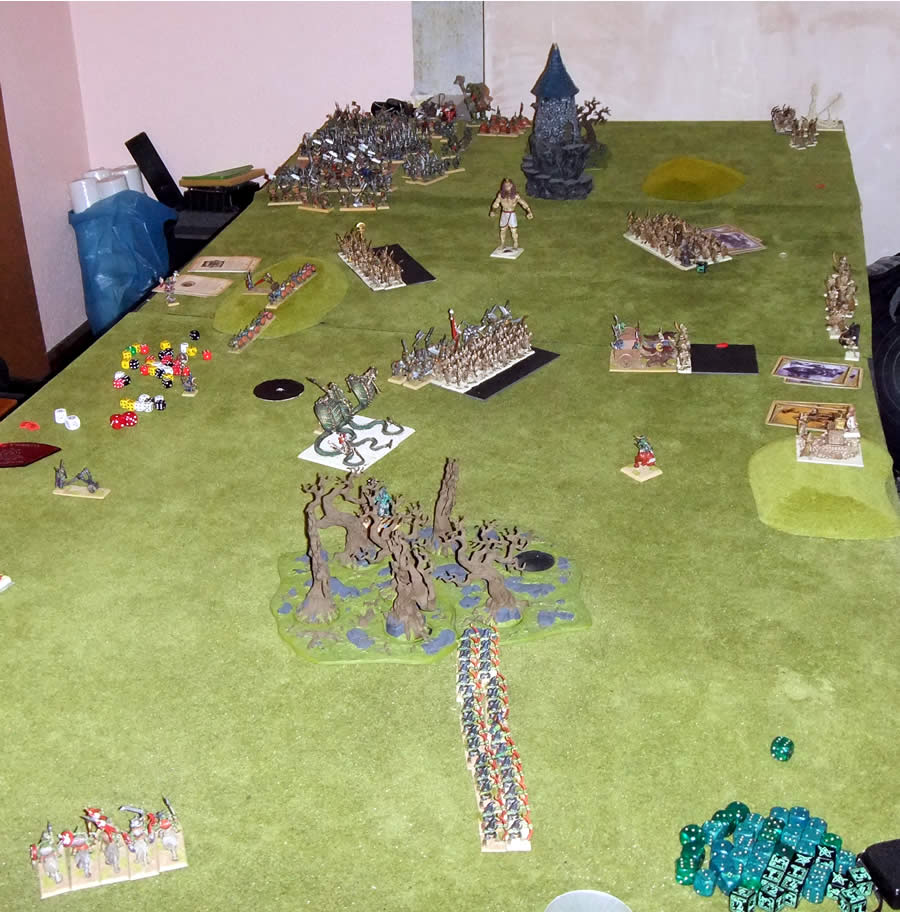
Our most recent game, was a stunning display of preparatory slackness on my part too.  I simply took the same list as last time; having found it in the army book where I left it.  Jason on the other hand took the new-ish  Tomb Kings army; one I've only rarely faced.  My deployment was linear, but with the bulk of my Orc and Goblin horde on an open plain in the centre of the battlefield.


My overall commander, Skarsnik, managed to delay a couple of the key Tomb King units and so Jason's line looked patchy at first.  As ever I took the first turn when the dice permitted me to, and made a swift advance against the Undead legions.  As is often the case, my Orcs and Goblins do one thing well above all others, and that is passing Animosity tests.  I recall failing two in the game, which at 4000 points is not too shabby...


One issue with Jason's 10 foot wide table is exposing your flanks to the enemy.  I think to minimise the impact of this we both went with a compact centre, and a handful of minor units to cover the other half of the board.  I was relying on my light cavalry to cut down the scale of the field.  But Jason was able to stop my stronger right flank (closest to the camera) with some tiny, but resistant units.


In the centre the Orc Giant led the assault, with artillery fire from Doom Divers and Rock Lobbers covering the attack.  But the Reserves of Jason's army were arriving fast:


His Snake riding knights (real name escapes me) made short work of a sacrificial unit of Savage Orcs I hoped might delay them whilst I reached the main line of the enemy.


But the Undead were not for making my life easy, and indeed my flank attacks on his right, along with Jason's fear of 'Hand of Gork' thrusting my units right into his path caused him to hold back whilst his fearsome snakes did their merciless work.


When they finally countered, once my Giant had been killed, the Undead charged and swiftly destroyed - thanks to powerful magic - Skarsnik's huge unit of over 90 goblins.


By now I had cleared the flanks, but my centre was collapsing.


I conceded after five turns, knowing that whatever totting up the points of the battle may have suggested it was clear that I had lost on the battlefield.  Yet for all it's onesidednesss, it was a great fun experience.  Magic was a major factor in the game, I got few spells off but those I did helped stem the tide, and I was able to contain some of the Tomb Kings magic, but their spell to increase their fighting abilities did for me.  The Snake riders proved absolutely lethal, and something to deal with more robustly next time.

But mainly I think I lost by spreading my flanks out too far, costing me the ability to counter my opponent.  It turns out, several lessons learned.


Tuesday, March 12, 2013

2/39th and the Loyal Lusitanian Legion

I've been painting Napoleonic infantry for the first time in ages, more pointedly British infantry for the first time in years:

The 2/39th Served in the Peninsular Wars from 1809, seeing action at Busaco, Torres Vedras, Albuera and Vittoria.  Their uniform being of green facings.  I elected to do the unit in badly worn uniforms with lots of repairs and locally sourced cloth:


I'd forgotten how long it took to assemble Victrix Brits, and how tedious the British uniform is to paint, but after twenty or so hours they were done.

I went from those straight into a unit of Portuguese to follow up, making use of a ancient selection of Hinchcliffe miniatures donated to me by a club member.  They were rather basic British infantry models, but this meant a simple conversion would be enough to turn them into the Loyal Lusitanian Legion:


Serving in this form from 1808 to 1811, the LLL was a light infantry formation raised by colonel Robert Thomas Wilson, also present at Busaco, but noted for it's raiding activity.

Personally I think there is a charm to the Hinchcliffe models, sure they are slight and crude compared to the Victrix but they paint up easily and en-masse they look fine.


So that's two more regiments for my Anglo-Portuguese army, in the same number of weeks.  Providing valuable reinforcement for the upcoming game.  Next up, more French I think...

Sunday, March 10, 2013

Blasted and Beaten Down

I went around to George's to try out the demo board he's been working on for the Bolt Action game.  Given he'd only spent a month of his spare time on the boards, the finished result (with my reworked buildings and wrecks) looked really good:


A nice touch is the shot down German fighter, which provides a distinctive touch of period to the battlefield, the work George had done to place the terrace in to it's environment was excellent too.

Obviously we tested the boards with a game of Bolt Action, and decided on 750 points.  I'd picked a themed list of a defensive detachment, centred around an anti tank gun and an anti aircraft system, which I elected to place in reserve.  Just as well really.


The British, in game, have a lot - I mean a LOT - of artillery.  And so George started the game by blowing the crap out of my Germans.

Everyone having taken a couple of pin markers, we attempted to weather the storm...


The British advanced and unleashed yet further artillery.  For my part this left me with half my force, including my own Artillery observer and my sniper completely out of action.

Thankfully my flak gun arrived and started rattling 20mm rounds into hapless British infantry units.


Whilst on the opposite flank, the one German infantry squad to avoid the tender mercies of the British 25 Pounders, kept the rest of the Brits at arms reach.


Still with most of my troops wore down by artillery, it was proving an uphill struggle to keep the Tommies at bay, not helped by their running a PIAT team forward to destroy my Flak gun.


The British now held one of the three objectives and were close to contesting another.


This forced me in to relatively petty reprisals.  Turning my Pak 40 first onto the British Bren gun carrier, and then onto the infantry, with a handful of HE rounds someone had provided for us.


Why not the Humber armoured car?  Well sadly, a flaw in the Recce rules means that any time you turned a gun on the Humber it could simply hide behind a nearby building, for free.  It was just pointless to shoot at it, so I didn't bother.  That rule is irrefutably broken.

As was my force by the end of the game.  With a steady battering of fire my troops were just incapable of offering resistance.  A Pak 40 and a dozen infantry slunk away.

An enjoyable game, but due to the artillery, very much a one sided battle.  As I've already said this month, Bolt Action is an imperfect beast.  But George's terrain is excellent!