Wednesday, January 31, 2007

St Martins 1643

Being a hypothetical game set in the English Civil War; using Peter Pigs' "Regiment of Foote" rules.

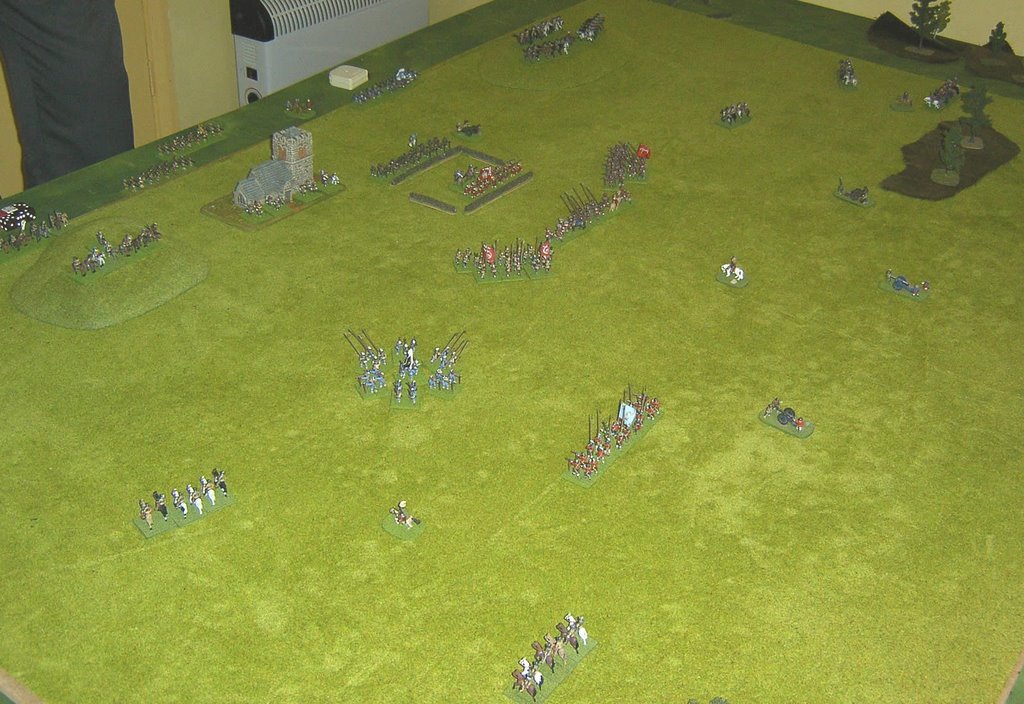
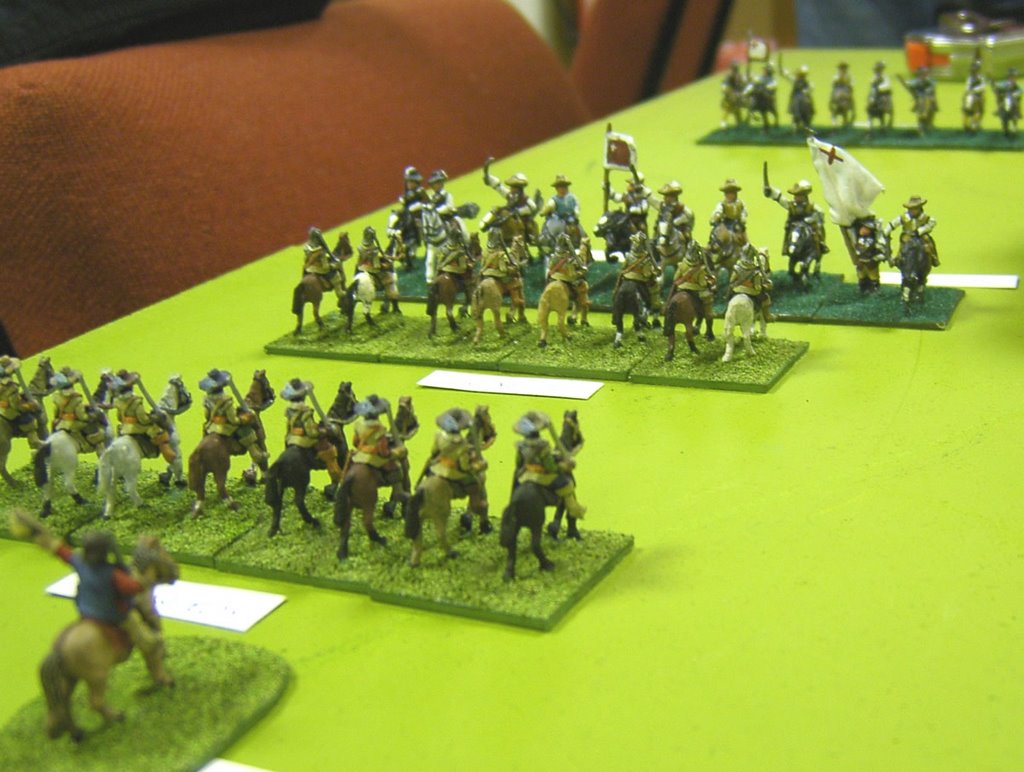
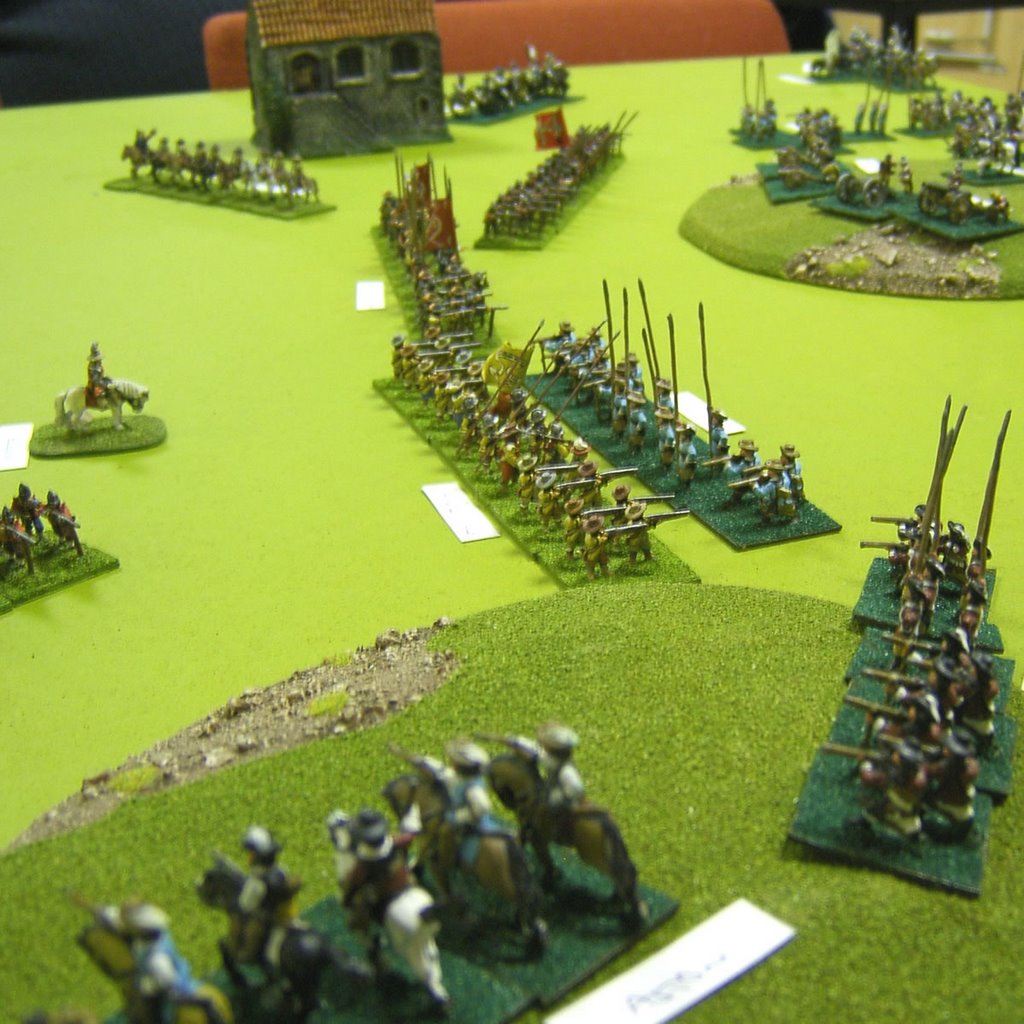
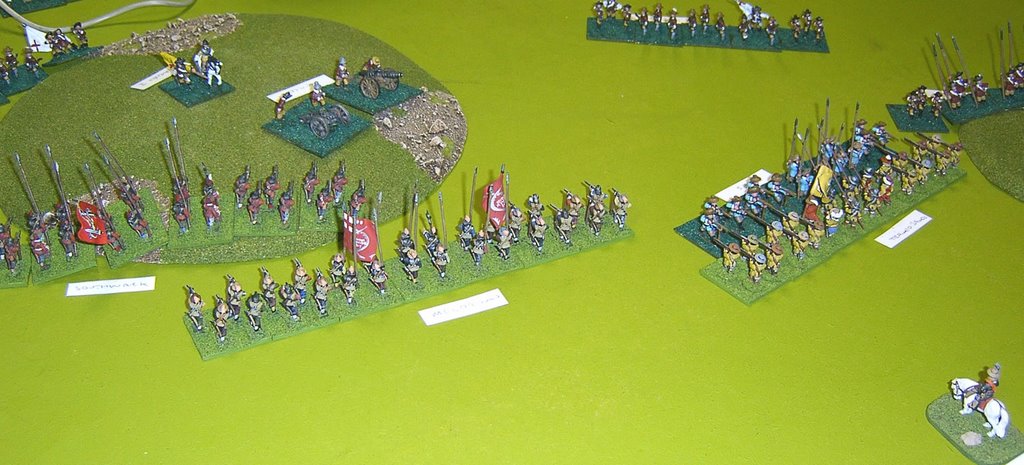
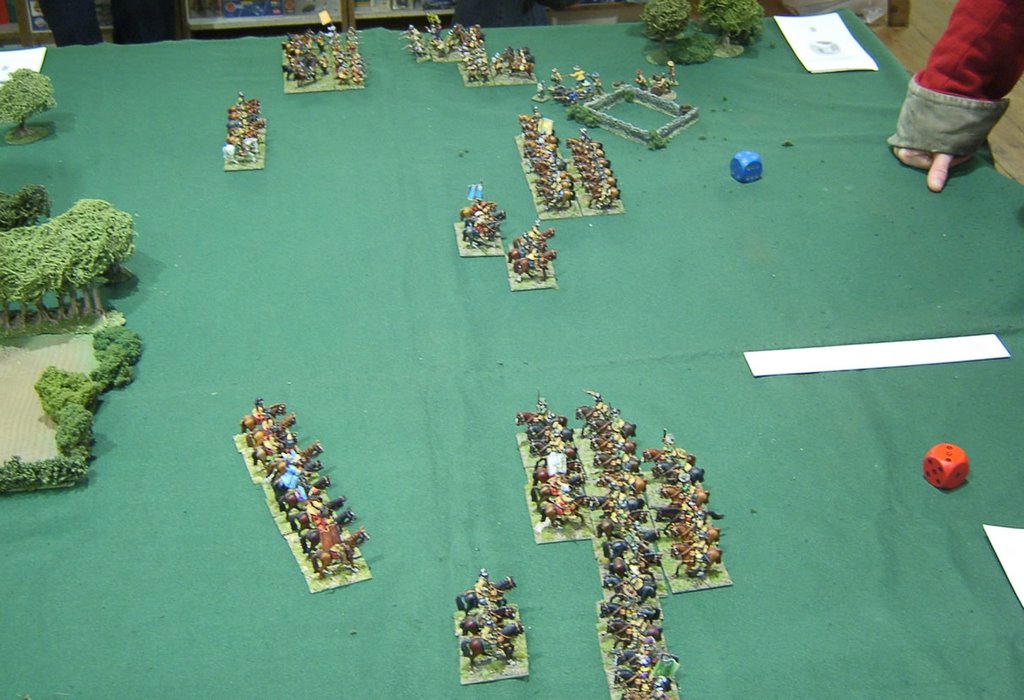
The two armies before the battle; The Royalists under Hopton with 6 Horse troops, 6 companies of Foot and 2 cannon:


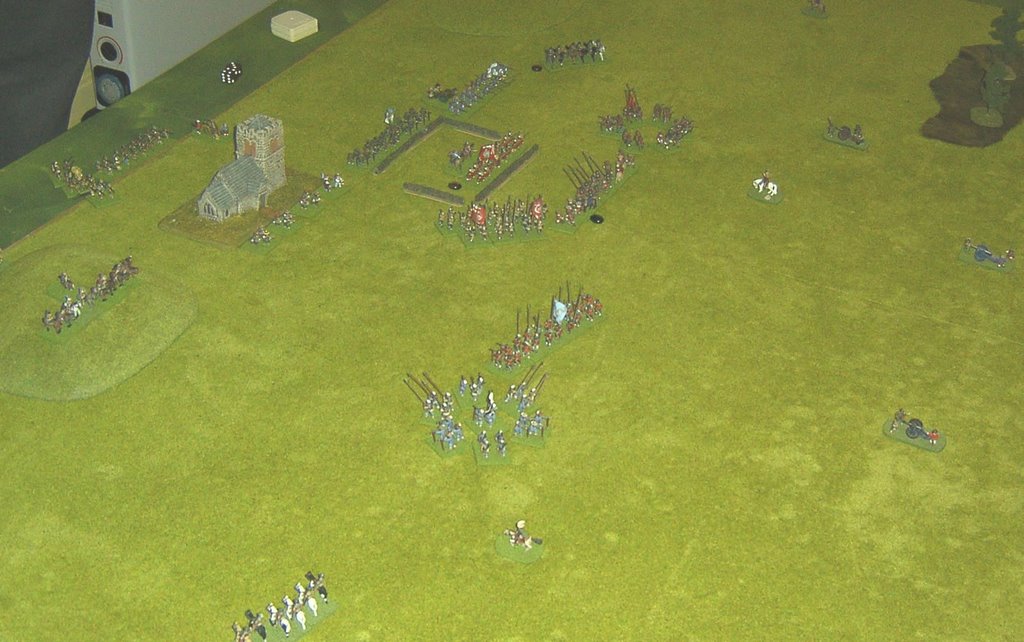
Parliament, under Waller; 5 Horse and 6 Foot, 3 cannon:


Being Peter Pig rules there is a pre-game sequence to be carried out, some may call it foreplay even (not my opponent though!). The campaign system determines a number of details about the game, such as who is the attacker (he who ends up marching most) supplies, disease and losses in skirmishes. All of which goes a long way to adding character and a back story to a game. For my part as Parliaments true hand, I found disease and cavalry engagements cost me men, but I was left with a more experienced army overall. The net effect for the Royalists were negligable in this instance; he managed to avoid both the good and bad results.

The campaign determined Waller was the attacker, so Hopton had to choose his field of battle, and see which of his troops were available. I'd have to say Hopton picked his field of battle very, competitively, I had no luck influencing it. However when it came to reserves, he found himself with few troops on the ground.

Hopton Deployed an modest foot centre, defending a stonewalled field, with Horse flanks. Waller deployed his weakest troops to the left, a strong Foot and Artillery centre, and a veteran Horse flank on the right:


There was an opening Cannonade by both sides, which saw Wallers heavy gun 'Bess' inflict casualties on the Royalist centre. Once this was over the Parlimentary foot began an enthusiastic advance.


The Royalists elected to stand and take it until the reserves arrived in force, meanwhile the centre of the Parliamentarians closed, whilst the Horse moved more slowly.


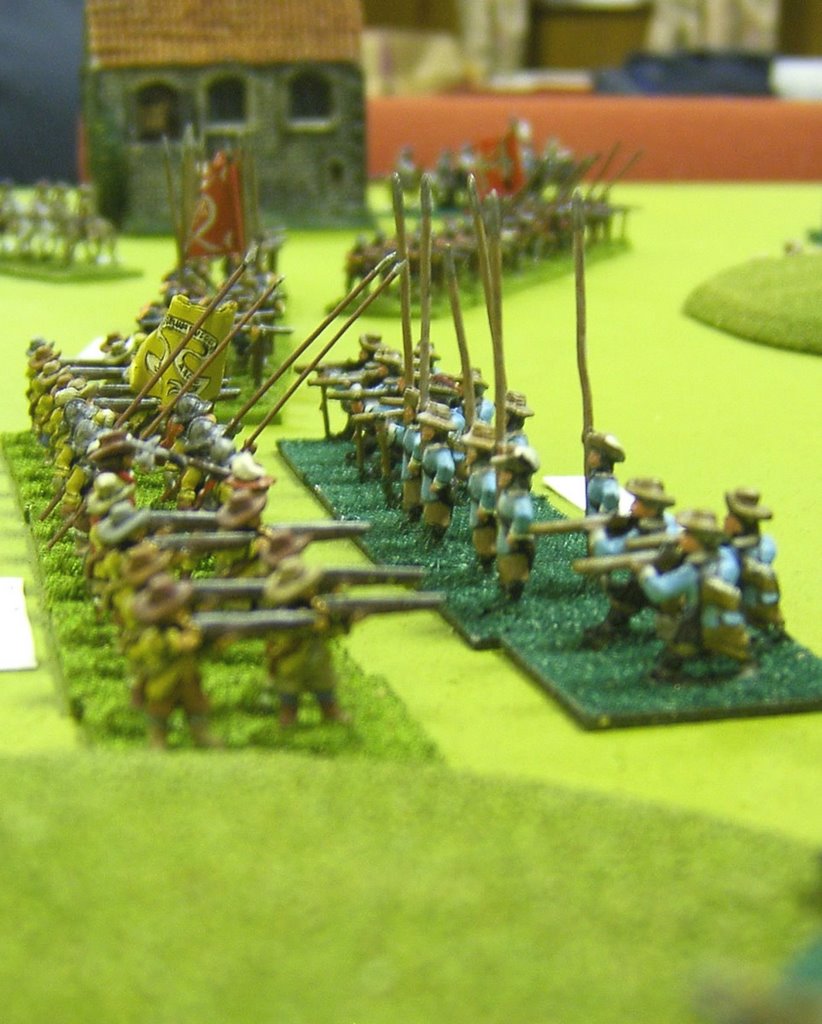
The centre moved into range of the Royalists and started to hammer them with fire, The royalists however were able to keep their heads down and suffered negligable losses. Hopton kept them in check and used the field as a strong point to marshal his forces from as a trickle of reserves began to arrive.


On Wallers right Hoptons horse charged, and did some harm, but the Parliament horse could throw reserves in where the royalsts could not, and soon pursued the remnants of the royalist troop off the field. Then another troop of royalists inflicted a similar result onto another unit of the right flank, they pursued of course, taking their commander with them. Not having a commander around can cripple forces, but even so this left my infantry exposed, so as a precaution Waller formed the right flank company of foot into a pike stand.


It was time to finish the business of the day. With both Royalist flanks clearly stalled, Waller sent the Tower Hamlets trained band in against the field. Melees involved lots of dice rolls in this fight it was around 40 D6 for me against 30 for the Royalists. Hoever they were conscripts, whereas the trained band were London veterans. I had twice the chance of causing damage, and did so with aplomb.

The Conscripts were wiped out, and Hopton fell amongst them. The Royalists had to hand command to another in the centre (a dice roll determining quality), sadly only toadying fop was available for the task. His brief command was of little help to their campaign; he too was killed when the trained band rolled up the second company of foot in the centre. The next available commander could was barely old enough to sit in a saddle, and despite some reserves coming up into places they could stall the enemy, he decided to seek Parley.


Parley gives a commander opportunity to end a battle early on favourable terms, in this instance Waller was prepared to listen, and the parley went well for the Royalists, but none the less they were found to be well beaten; to everyones relief, Hopton limped into camp late that night, anasty concussion and a cracked skull had left him amogst those lain on the field until sunset.

All in all Regiment of Foote give an excellent feel for the period, with lots of nuances that add to it reflecting the particular circumstances of the English Civil War. It has to be notable too, as a game that possible requires more dice than a game of Warhammer.

It plays to all the Peter Pig/RFCM strengths, is reasonably quick, and good fun.

Sunday, January 21, 2007

A new convert

To Acrylic paint that is...

I think I may be one of the last wargamers using Enamel paints; I have done so for OVER 20 years! However I was getting increasingly dissatisfied with them, not so much from the working standpoint, I knew no different, but from the longevity and pracicality.

I can't remember the last time I actually finished a pot of enamel by painting it out. Doing figure work means small amounts of colour out the pot often, so they eventually go off, The oil separates from the pigment and dries on it's own; from that point on the pot is stuffed - good for dry brushing and diluting with thinners for a few more jobs, but really you buy 14ml of paint to use 5ml. They'd stopped being economic. Furthermore there's the thinners, the smell (which I'm now immune to but noone else is), and so forth.

The last straw was Humbrol/Airfix going bust in the summer; it meant supplies of my preferred paints were about to expire. From that point on I wondered if acrylics were worth another try...

I'd last used acrylics paint in about 1990, and loathed them. To be fair my technique at the time was rotten but I found them too thin, a mix of Humbrol and GW acrylic paints were relegated to a sideline job at the time - colouring latex for fantasy masks (say no more).

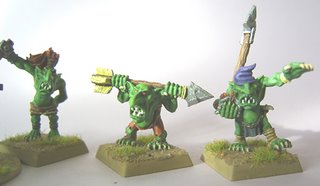
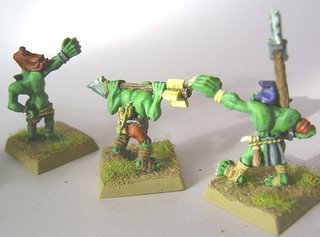
So anyway, a long preamble but I've cracked; last week I spent £30 on Vallejo Model Colours, from my local model shop (Halifax Modellers World). I got a starter set and a few extra colours to fill out my pallete, and looked for something to paint. I had a Goblin Spear Chucka as a present for xmas, which seemed like a good thing to try. The weapon itself was already part painted in oils so I used the crew as a test bed:

I need to relearn my favoured colours these goblins are greener and more cartoony than my normal goblins, but overall I was really impressed. The cover was excellent over a black undercoat, the paints were a revalation for being so smooth and consistent. All I had to do was shake the bottle and get on with it. The paints mixed well and went on smooth; and didn't dry so fast that the brush suffered.

Only disadvantage I could find is that the paint has no tolerance for handling, it rubs off with any degree of friction - enamels don't - I need to see if using an enamel undercoat helps, in which case I'll still need the odd pot of black lying around for when a spray is too much. Naturally everything will need varnishing.

I don't think there'll be any going back. Now I just need the fill in some of the colours I need (a more believable metal shade, more greens and browns), and get some more practice...

Saturday, January 13, 2007

Studley moor 1643

Not quite the first game of the new year (had a couple of DBA games the week before), but the first outing for the camera equals the first blog entry of the new year.

15mm English Civil War. The rules used were a set of computer moderated rules capable of covering most periods of warfare with organised units (I'm afraid I cant recall the particular set, sorry folks). As such it mean't no dice throwing and a slightly divorced sense of control of ones' troops. The effect being pretty much to put you squarely in the shoes of the general; giving commands and hoping to see the results you desired.

One advantage of the computer moderation was that the reactions to combat and casualties were more varied than many rule sets allowed for, and that you never know for sure how badly any unit is faring, you had to use a degree of judgement to try and guess; though it seemed that three melees in a row was the limit for most units.

Anyhow, I pitched my Parliamentarians onto the field, for their first battle in some 6 years, I've been working on a Royalist force to face them for a few months now...


My deployment was entirely conventional with for regiments in front and two in reserve, guns on the hills and horse to the flanks. My opponent used the hill to his centre for an artillery laager whilst his foot and horse divided to each side of it.


My infantry proved aggressive, I ordered an advance and they went to assault orders against my will, they intended closing with the weaker Royalist foot. On the Flanks the Royalist horse made all efforts to charge.


On my left this resulted in our both losing a troop of horse and both having one on the enemy flank. I decided to go for the Royalist infantry, whilst my opponent decided to try to return and catch my horse; I think I made the right decision, I can't speak for his, but he couldn't catch me...


On the right I prepared for the worst, getting reserves into Hedgehog formation. However my Curassier armoured 'Lobsters' were able to fend off and destry successive attacks by the enemy. In the end they were eliminated as a fighting force but the right flank was safe for most of the battle thereafter.


On the left My horse hit unprepared foot in the flank, and scattered them; by now they were exhausted though I would soon choose to withdraw them, whilst the Infantry closed.


The Trained Band charged the Royalists, as the rest of my infantry closed. Some Royalist horse returned to threaten my right, But broke on my Hedgehog formation.


After two rounds of combat in the centre the trained band withdrew, having routed their opponents...


At the same time Southwarks' foot rolled up one battery from the hill in the centre; the King now looked dangerously exposed.


The centre carried on up the hill and captured the entire Royalist armoury; at this point the King 'bottled it' and was escorted away by his surviving horse.


Parliament took the field of battle for the glory of God and true government. The computer stats, showed both sides fairly even in terms of losses, with about 65% of our horse left, 90-95% of our infantry. The real difference was in the loss of all the Royalist guns, and the fact that Parliaments' infantry had attacked aggressively from the very start. Despite being diceless, I found I pretty darned enjoyable; and that's quite important!

Saturday, December 23, 2006

Finished another one...

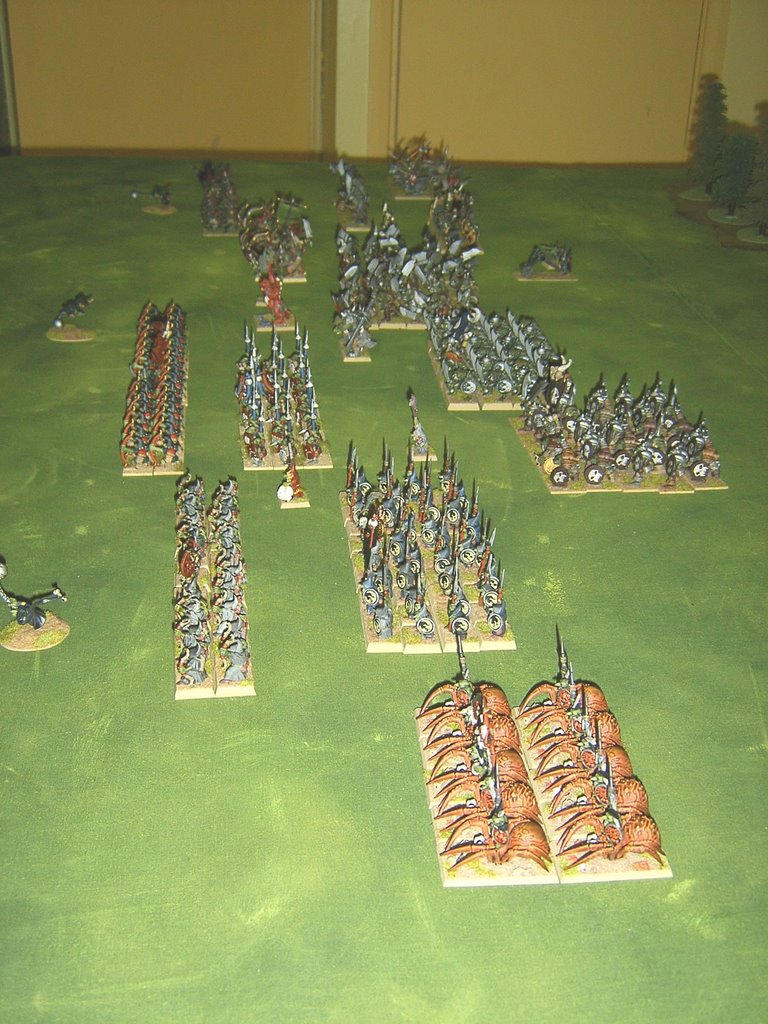
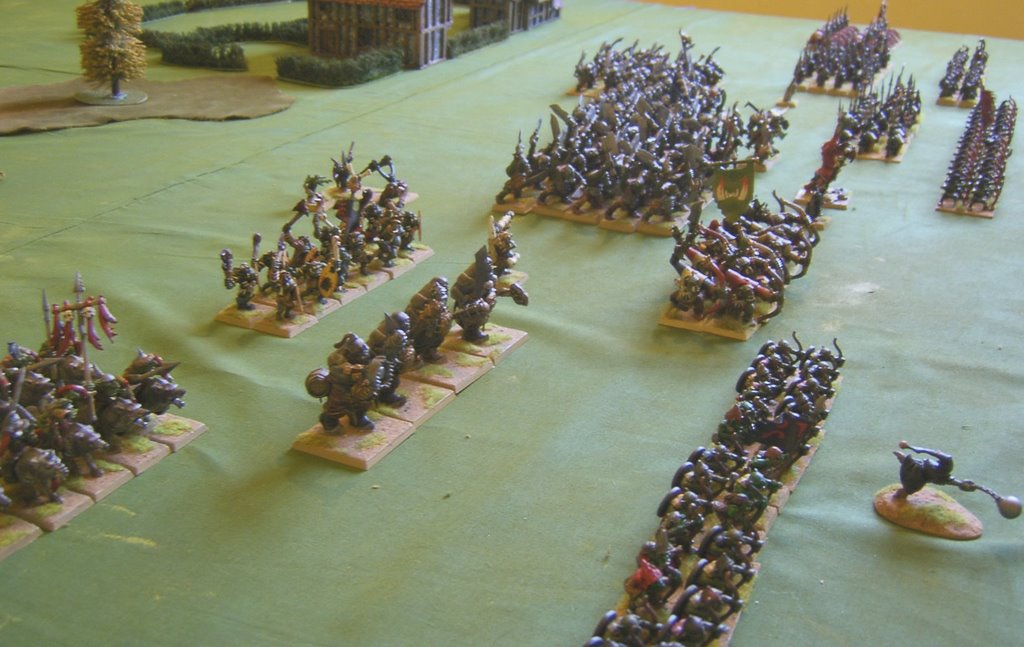
Begun about the time of the 7th edition release of Warhammer (Late September in my case) This is my Orc and Goblin army as it now stands.


281 figures in total so far.


Including 20 cavalry, and a bunch of monster sized critters and characters.


I've still a few figures to add to a couple of units, a chariot to paint, and another unit of Orc bows - if I can be bothered!


The warboss on the right is a 40K ork with Ogre arms. I was quite pleased with how the Battle For Skull Pass Troll came out.


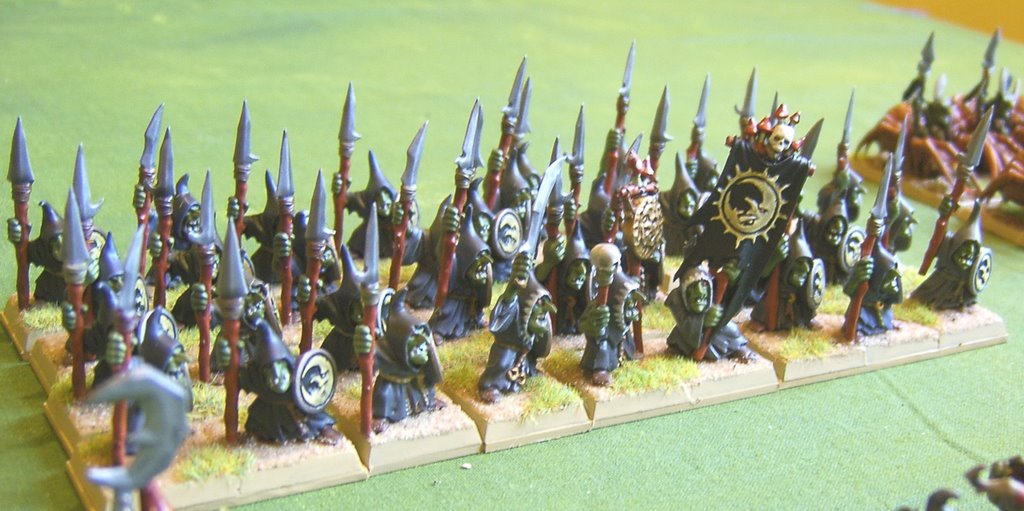
BFSP goblin spears, 36 as a single unit. The only way to field goblins is in huge units.


Goblin wolf riders, an absolute pig to paint


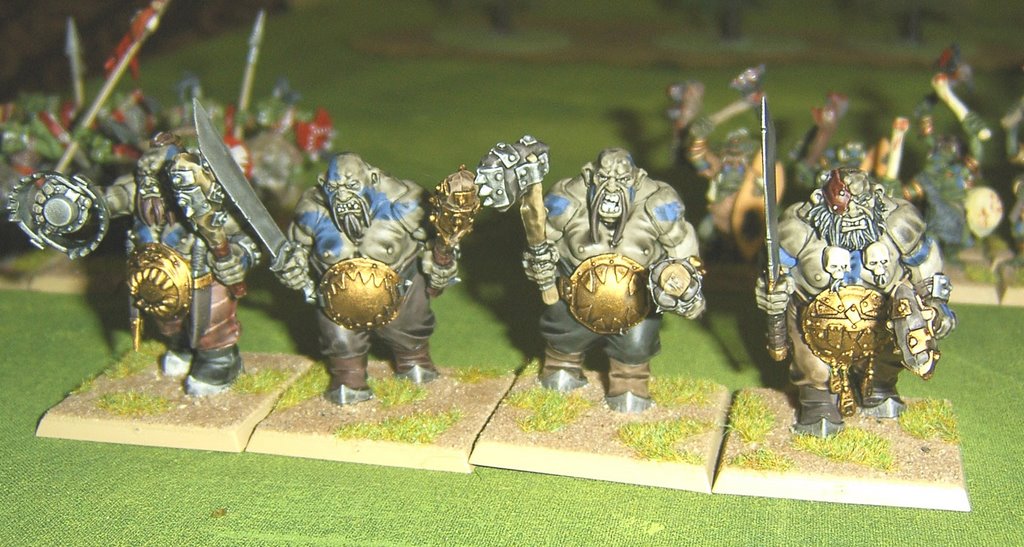
Ogres, easy by comparison.


Savage orcs. Actually painted sometime back around 1996!


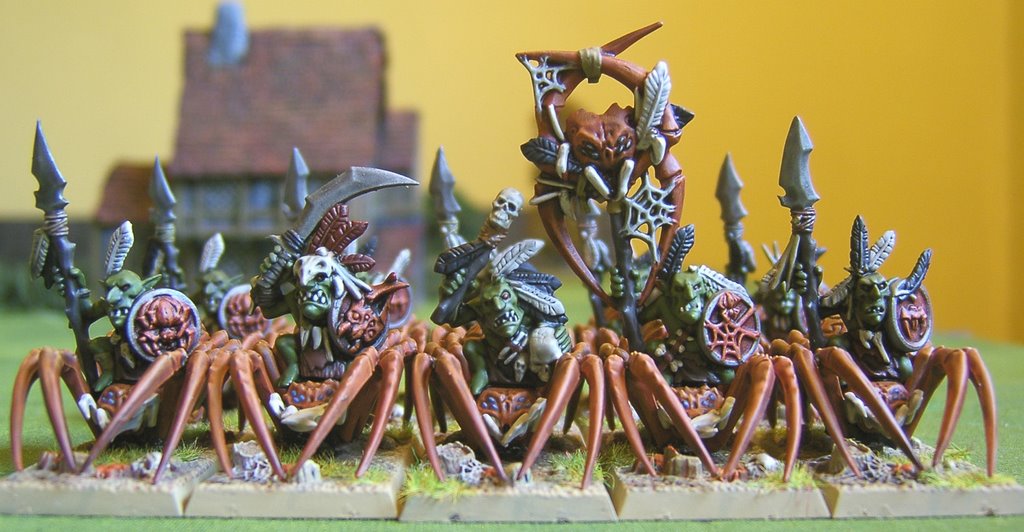
Spider riders, fun to paint, but slow to finish.


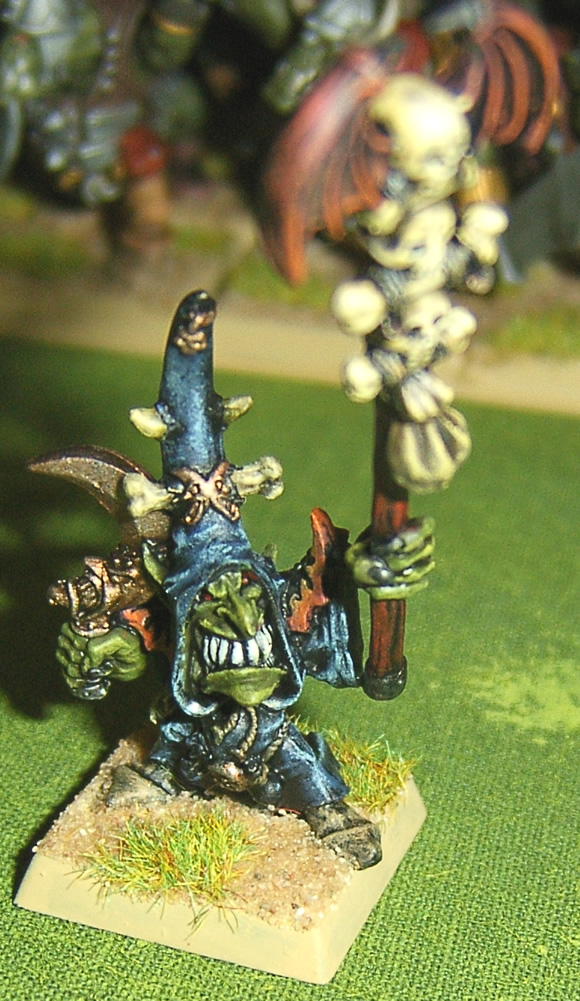
Goblin Shaman, another old figure but a favourite of mine.

That's the last output this year I reckon. And what a productive year this was: a Republican Roman army in 20mm, a New Kingdom Egyptian in 15mm, a Japanese Imperial Army in 20mm, and the Orcs and Goblins in 28mm. About 900 painted figures. Additionally I expanded my Medievals, Rebased my ECW parliamentarians, started an ECW royalist army (100 figures so far), touched up my Vampire Counts army, and did about 200 WW2 sales and commision pieces. I can't really complain! I hope next year goes well too...

Merry Xmas folks!

Monday, December 18, 2006

The battle of Mastenhaas 18xx?

Sunday was my last game before the Xmas break, and featured another bout of the Napoleonics in the form of a unlikely facing of Dutch against Austrians and Bavarians. I suppose such a battle was a plausible as many ancients match ups I'd try, but it was basically dictated by the available figures.

The scenario was a classic village assault, with a small force of Austrians defending Mastenhaas.


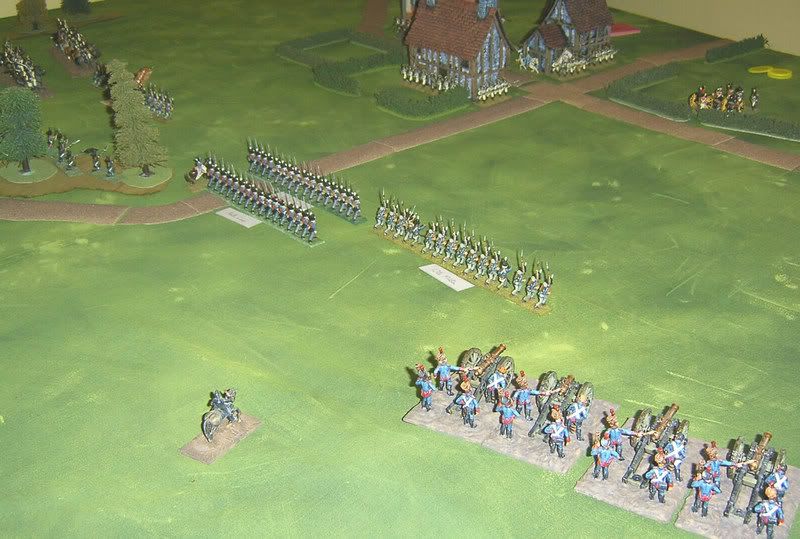
I was commanding the Dutch under the Prince of Orange, and outnumbered the initial defenders about 3 to 1. I went with what Phil, my opponent, seems to thing is my classic tactic; a thin centre and a strong flank, intended to hammer the enemy flank then roll him up.

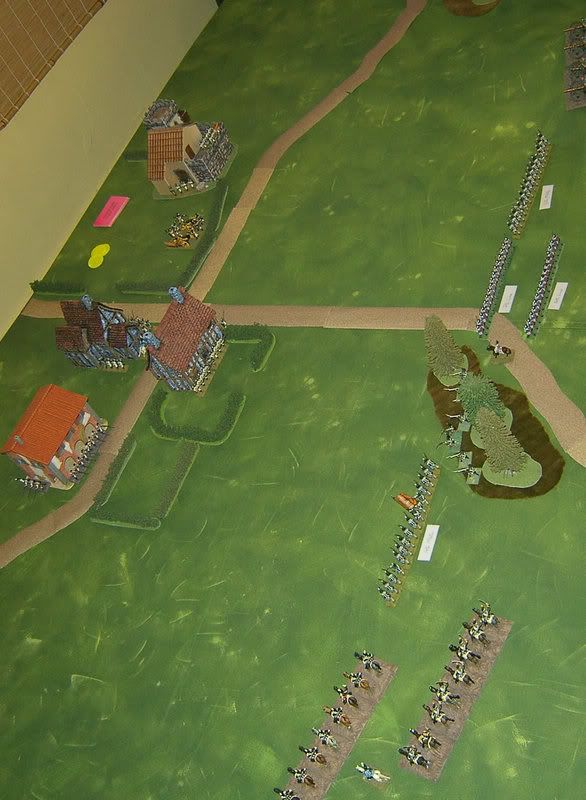
Here you get the sort of aerial view most commanders could only dream of, of my centre.


My centre got going fairly quickly, whilst the Right flank took some manoeuvring to get started. Initially, all the Austrians could do was bide their time awaiting reseves.


Eventually some reserves did arrive in the form of Lancers and Hussars, the Cavalry fight that ensued in open ground to the left of my army lasted the rest of the day, and ultimately had little bearing on the out come of the game, though it ultimately saw my cavalry beaten.

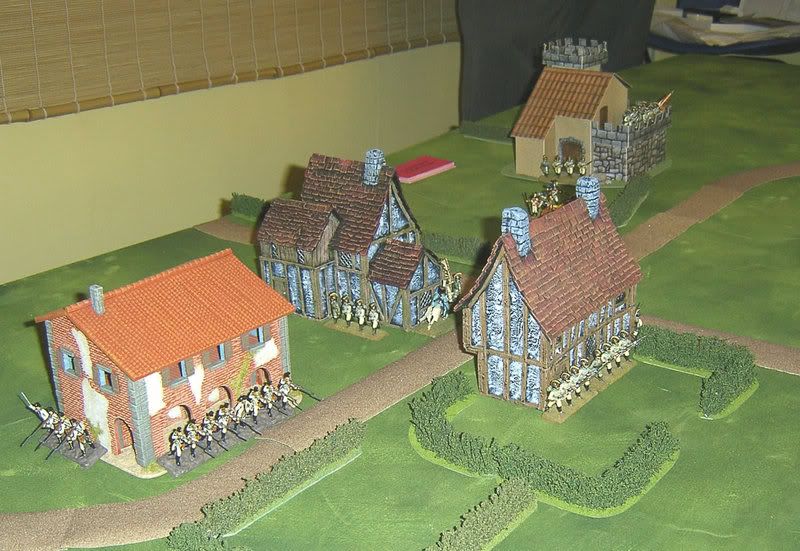
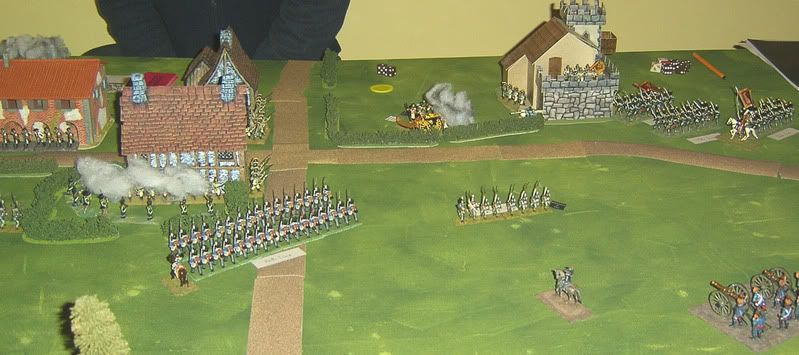
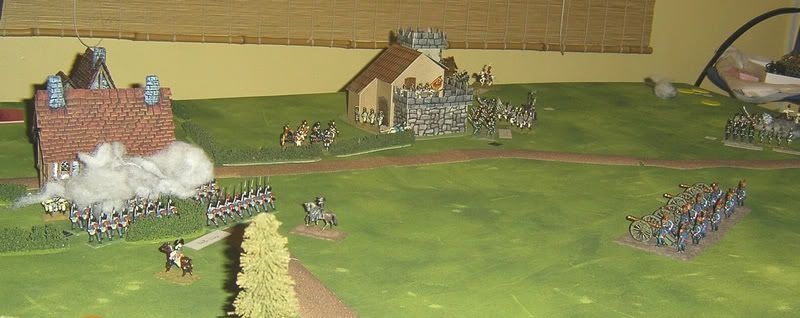
At the high-water mark, my forces began an assault on the manor and one of the village houses; managing to bring off a simultaneous assault. The Austrians were initially having no luck stopping me, although cannister fire from the artillery ravaged one of my battalions who can be seen running in the centre.


It was downhill all the way from here for the Dutch. Both houses proved unassailable. My losses were not desparate, but each assault failed to maintain any pressure. At this point a Bavarian infantry column appeared on my right flank. I was able to meet it in good order, and thought I'd have it soon beaten, when one of its' battalions broke to well coordinated musketry. But things soon reverted to the dismal note they'd been playing for a while.

In melee after melee I was defeated, for round after round the Dutch stood impotent whilst the Austrians laughed at them from inside their houses. At the bitter end I made one last desparate effort to attack the houses again; but instead found both attacks under threat by reserves.


It seemed like a good point to throw in the towel. Although at no point in the battle were the Austo-Bavarians anything other than outnumbered 3 to 2, the village was such an effective point of defence, I couldn't make the slightest progress. In retrospect I think I should have moved the artillery in to more or less point blank in the centre and hammered each building in turn. but overall I felt my plan was sound, merely beyond the size of my force to achieve.

Good fun, and a nice way to round off the years games.

Tuesday, December 12, 2006

Free rules: issue one - WW2 onwards

My xmas present to any readers out there; a set of rules I originally developed for a godson with an interest in toy soldiers. The idea of these rules is that they be really simple, whilst having some degree of tactical complexity and a command structure. As an introduction to gaming with figures I hope they sufficed, and they can easily be used as a simple club game or whatever for any period from the 1930's onwards.

Basic Rules
Measurements

All measurements are in Imperial Inches, this is simply because the centimetre is too small to be a useful wargame measure. If you prefer the centimetre, simply convert all measurements by a factor of 2.5.

Scale

Figure scale is by default 1:72nd scale or 20mm. This is based on the likely case that a couple of boxfuls of plastic model soldiers are used to play. Of course there is nothing to stop more polished models or different scales being used. There is no need to revise measurements for use with 15mm figures. With 6-12mm figures you may wish to half all measurements; with 28mm or bigger you may wish to double them.

Equipment needed


Rulers or tape measures marked in inches, at least 12 inches long
At least a half dozen six sided dice
a playing area no less than three feet square
a selection of scenery or markers to show it by proxy
two forces of figures typically 20 or more a side
pencil and paper


Units

Units are formed of standard sizes at the start of the game:


Squads are five figures strong
Machine gun teams are two figures strong
Mortar teams are two figures strong
Commands are two figures strong
Vehicles are always bought as single models
Units must stay together, no more than 1 inch between each figure in the unit.

As a unit takes fire it will remove figures. This does not reflect outright casualties, but does show the state of the unit (its' morale; for younger players figures removed are stunned or pinned down and may well recover later in the game). When a unit is reduced to no figures at all however, it is permanently out of the game (it is destroyed).


Forces

A force, or army, is formed of any number of units adding up to a points value agreed by both sides (see points values below).

Starting deployment

Once terrain has been laid out on the table, each player will roll a D6, the highest score may chose his side for deployment. The opposing player deploys one unit upto 6 inches into the table (unless he has trenches to deploy, see Trenches, etc in the advanced rules). Then the first player deploys one unit and they continue this way, alternating deployments, until all units are on table. There is no hidden movement.

Sequence of play

1: both players roll a D6 for initiative, highest score may elect to go first or second.
2: first player to activate a unit selects one of his units and attempts to control it (see below). If successfull it may then move and or fire in any order.
3: the second player now takes their turn; which must include moving any troops not in cover who have taken casualties as noted under morale below.
4: the first player now takes an action including compulsory moves and the game continues.

Control of forces

Once a unit is selected the player must roll a D6 to activate it, to activate a unit you must score a 3+ on a D6. You may add one to your roll if a commander is within 6 inches of the unit. A roll of 1 is always a fail. Failed units may do nothing.

Once a unit passes the test if may move and /or fire in any order, so long as each action is done only once whilst activated. Once done, the turn moves to the opposing player; as it also does when a unit fails.

A unit which is attempting to activate twice in a row (or more frequently even) must score a 4+ to activate. It is perfectly acceptable for the same unit to repeatedly activate, but this is tiring.

As noted under morale below. instead of activating a healthy unit, a player may use his turn to try to rally a retreating or pinned unit. This is all that may be dne in his turn if the player chooses to do this.

Movement

Infantry move the roll of a D6 plus 3 inches (D6+3")
This is reduced if moving through cover as D6 inches

Vehicles move the stated distances on their statlines (see points values below).


Cover is anything which is placed on the flat table to block lines of sight, for example areas of trees, counting as a wood, lines of hedges or walls, buildings and so on. Hills and buildings blockline of sight entirely to troops behind them, but otherwise units in cover are considered visible.

Infantry fire

When an infantry unit declares a target it wishes to fire at, measure the distance to the target, a unit may fire if any part of it is within the following distance(s) of the target unit:


    • Infantry...................................12 inches
    • Machine gun teams..............24 inches
    • Mortar teams*.......................36 inches


*Mortars may fire at targets out of line of sight of themselves, so long as any friendly unit on the table can draw a line of sight to the target.

Units roll the specified number of dice to hit for only those figures in range of the target:


    • All five figures: 3 D6 needing 6+ to hit
    • 3 or 4 figures: 2D6 needing 6+ to hit
    • 1 or 2 figures: 1D6 needing 6+ to hit
    • Machine gun: 3D6 needing 5+ to hit
    • Mortar*: 4D6 needing 6+ to hit


*Mortars roll only 2D6 if they themselves cannot draw a direct line of sight to the target.
The firer loses one D6 if the target is in soft cover
The firer loses two D6 if the target is in hard cover


Soft cover is trees, bushes, hedges, fences, ditches and similar
Hard cover is walls, houses, boulders, trenches and similar
Mortars are mot effected by soft cover


Each succesful roll removes one figure from the target unit and causes it to either retreat or become pinned (see morale below.)

Morale

When a unit suffers the loss of any figures it will either retreat or become pinned down:


Troops with casualties in contact with or on an area of cover will become pinned. Lay the figures down (or mark with a yellow counter)

Troops with casualties who are not in or on an area of cover, will retreat away from their nearest enemies, towards cover until they reach cover, upon which point they become pinned. Face the figures away from enemies (and/or mark with a red counter)

Whenever a player has the chance to activate a unit he must first retreat all units with casualties which are not pinned down. Retreaters move 1D6+6, to a maximum of 9 Inches.

Instead of activating a unit, the player may choose to rally a unit. In which case he must roll more than the number of casualties the unit has lost on a D6 (e.g. ifthe unit has lost 2 figures the roll must be a three or higher). Gun and mortar crews, and commanders always need to roll a four or higher, due to their smaller initial numbers. If a unit attempts to rally within 6 inches of a commander it adds one to the dice roll, though an unmodified result of one is still a fail.

If the unit is rallied it is returned to full strength and removes any markers. It may make a normal move so long as it does not advance closer to any enemy this turn; and it may fire.

If the unit fails its' test it must retreat or remain pinned as normal, other retreating units are moved and the players turn end. In either case all retreating units that can't take a test that turn must move (until they can become pinned) before play reverts to the other player.

Winners and Losers

When a player finds all his infantry Squads to be either Retreating, Pinned or Destroyed after an opponents turn they are permitted one attempt to rally a single unit. If this fails they are defeated immediately. If vehicles are being used, a player is defeated when all cannon armed vehicles have been destroyed or have left the field of play.

Advanced Rules

Vehicle Movement

Vehicle movement is listed on the statline for each type; for example wheeled vehicles normally move upto 2D6+6 inches. Vehicles move half speed in soft cover, and always roll a separate D6, a roll of 1 indicating they have become stuck, and may no longer move. No vehicles except Medium and Heavy tanks may move through hard cover, and they are at half speed and get stuck on a D6 roll of 1 or 2, if they do.

Vehicles always roll an extra D6 when their entire move is on roads.

Vehicles need never move their entire allowed distance.

'Vehicle' fire

Weapons other than infantry firearms, mortars and machine guns are considered cannons. Each has a different range and uses a different number of D6 to attack:


(Weapon; Range; Dice vs Infantry; Dice Vs Vehicles)

Light Cannon; 36 inch; inf=3; veh=2
Medium Cannon; 48 inch; inf =4; veh =3
Heavy Cannon; 60 inch; inf=5; veh=4
Bazooka; 6 inch; inf=3; veh=4

When firing against infantry, each dice needs a 5+ to hit

When firing against vehicles each dice needs to roll equal to or over the armour value of the vehicle (for example a light tank has an armour value of 4) on the dice. If the dice result in 1 hit, then the vihicle is damaged, and loses 1 fire dice on future turns. Mark it with a yellow counter. Damage is cumulative, each turn damage is done the vehicle adds a counter and loses a dice. If the vehicle is reduced to no dice against any target type, OR if it suffers two hits in the SAME turn; it is destroyed.


Vehicles never gain cover benefit, except if hull down; this means the vehicle is only partly visible to the firer behind solid cover, such as a building or hill ridge. In such cases add +1 to the vehicles armour, to a maximum of 6.


Vehicles fired on by a shooter who is entirely behind the back of the vehicle and able to shoot at the rear of it, lose -1 from their armour, to a minimum of 2.

Vehicle Morale

Vehicles never take morale tests.

Artillery

Artillery may fire at targets out of line of sight of themselves, so long as any friendly unit on the table can draw a line of sight to the target; as with Mortars.

Artillery may move or fire in a turn, not both, but so long as it goes first, artillery may fire(not move), and then another unit on the players side may attempt to activate. This is the only way two units may take an action in one turn.

Light artillery may fire upto 48 inches and fires with 6 dice versus infantry only

Heavy artillery fires upto 72 inches and fires with 8 dice versus infantry, and 4 versus vehicles at upto 36 inches only.

All dice against infantry need 6+to hit, roll against vehicle armour as normal

The firer loses 2D6 if they themselves cannot draw a direct line of sight to the target.
The firer loses one D6 if the target is in soft cover
The firer loses two D6 if the target is in hard cover

Minfields

Are laid in secret at the start of the game upto halfway accross the board from the buyers starting edge, they must be marked by a numbered counter - three for every real minefield; The owner writes down which of the sites is an actual minfield on a piece of paper (e.g. 'no.2 of minefields 1 to 3' or similar). Whenever the other player moves within 6 inches of a minefield counter it is removed from play unless it is a real minefield. If it is real it inflicts 4 D6 of damage to any unit or vehicle needing 6+ to hit infantry, and armour -1 against vehicles.

Once discovered a minefield stays in play and any unit straying within 6 inches of the marker is hit in the same way as noted above.

Cannons and Artillery may fire on an identified minefield as if it were infantry. If they score two or more hits the minefield is destroyed and removed from play.

Trenches, etc

Trenches, foxholes and so on are dug in terrain, troops in these features gain the benefits of hard cover even if placed in open ground. These terrain features if bought are placed by the owner after normal terrain is set up. Foxholes can give cover to upto 5 figures, trench sections (which may be joined together) upto 20. A player who buys trenches may set them up upto halfway across the table from their starting edge in any position they like, and may choose to deploy infantry to them.

Point Values


For a balanced game forces of similar values should be picked, a good small game without many models would be of 100 points per side, a large game with a number of vehicles would be of 500 points or more. Note that where one side is in defense of good ground with trenches, buildings to fight in, minefields and so on it should have only about two thirds the points of the attacker.

Infantry

  • Infantry squads = 5 points
  • Machine gun teams = 8 points
  • Mortar Teams = 12 points
  • Command squads = 10 points
  • Bazooka upgrade (replaces on normal infantry man in a squad) + 10 points

Vehicles

  • Truck (Move 2D6+6; No gun; Armour 2; carry upto 12 figures) = 10 points
  • Jeep (Move 2D6+6; Machine gun; Armour 2; Carry upto 5 figures) = 20 points
  • Personnel carrier (Move D6+6; Machine gun; Armour 3; Carry upto 10 figures) = 30 points
  • Armoured Car (Move 2D6+4; Light Cannon; Armour 3) = 40 points
  • Light tank (Move D6+6; Light Cannon; Armour 4) = 50 points
  • Infantry fighting vehicle (Move D6+6; Light cannon; Armour 4; Carry upto 7 figures) = 60 points
  • Medium tank (Move D6+4; Medium Cannon; Armour 5) = 80 points
  • Light motor artillery (Move D6+4; Light artillery; Armour 4)= 90 points
  • Heavy Tank (Move D6+2; Heavy Cannon; Armour 6) = 120 points
  • Heavy Motor artillery (Move D6+4; Heavy artillery; Armour 4) = 140 points

Towed guns

  • Anti-aircraft guns (Move D6; Light cannon x 2; Armour 3) = 60 points
  • Anti-tank cannon (Move D6+2; Medium gun; Armour 3) = 60 points
  • Super anti-tank cannon (Move D6; Heavy Gun; Armour 3) = 80 points
  • Light Artillery (Move D6; Light artillery; Armour 3) = 50 points
  • Heavy Artillery (Move D6-2; Heavy artillery; Armour 3) = 100 points

Minefields and trenches

  • Minefields = 100 points
  • Foxholes (for upto 5 figures) = 5 points
  • Trench section (Upto 12 inches long; for upto 20 figures) = 15 points
  • Emplacement (for one vehicle or towed gun; gives hull down cover) = 10 points

Sunday, December 03, 2006

Pudsey Recon

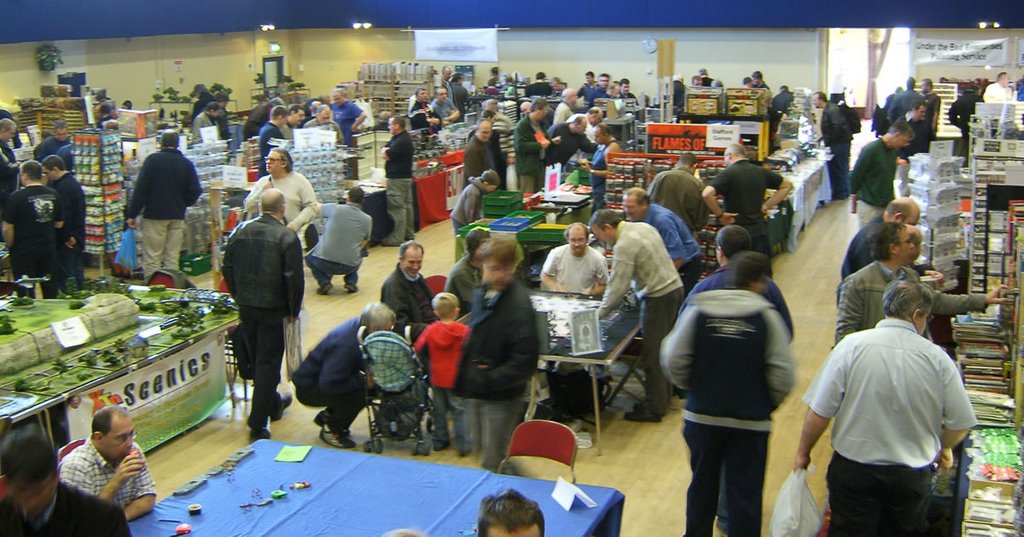
Wakefield and Osset wargamers run a show the first weekend in December, which because of it's proximity (less than 5 miles from my place) is one of the few I actually attend.


Its a small show, but usually well attended. As far as sales, I noticed that 28mm is easily the widest available scale at the show, with 15 & 20mm distant seconds and 10/12mm probably third. Sadly none of the books I'd hoped to find, but many figures, including some ex-Grenadier medieval cavalry at a quid a figure, a nice find!
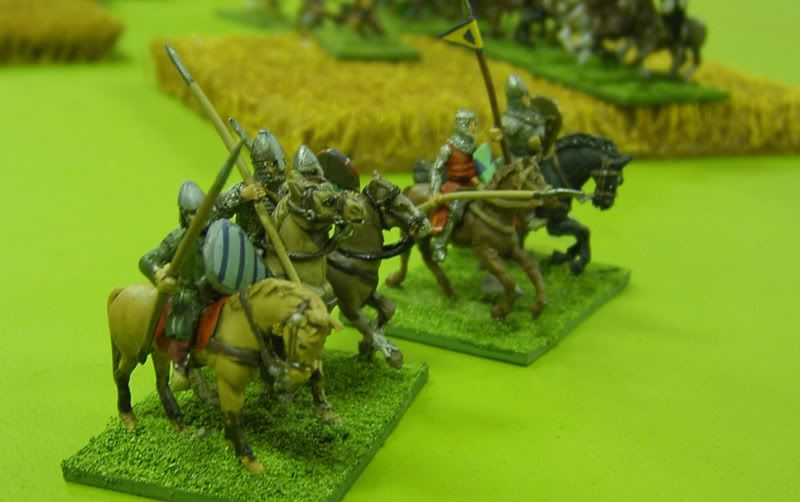
Although there were a few games downstairs, they were mainly fantasy demos, promoting figure sales as much as anything. Upstairs was where the historicals were.


The guy I'd taught WAB to was there with his schoolkids and a small game of 28mm dark ages. Nicely painted too considering they were done by a bunch of 11-13 year olds. One could see why they were in a wargames club and not on the football team, I think we've all been there at some point! anyway...


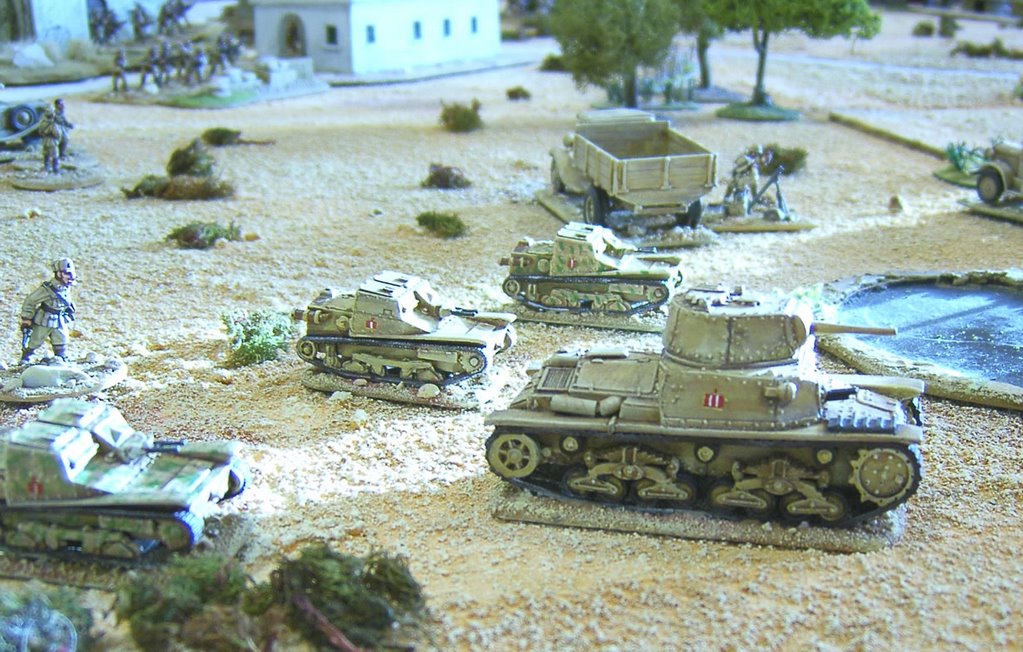
A highly attractive game of the desert war in 28mm (1/48th scale) was put on by the Ilkley club. Well, to be fair, I loved the look of the vehicles; especially the Italian tanks and a stunning Matilda. But the wargamery paint style of the figures (Really exaggerated shading and highlights) left the infantry looking like burns victims. A shame as from a distance, and up close for the scenery and vehicles, everything looked great.


An English covil war game, put on by some ECW re-enactors, nice figures in 28mm.


I had to laugh at the pained expressions that came over the faces of these guys when a wargames bore came over and started telling them how wrong their game was - "Too many dragoonss you know, I've been researching this period and most of the units fielded as dragoons were actually dismounted cavalry or never existed..." He was the sort of guy who obviously didn't like to listen nearly so much as he liked to talk, He slowly moved from stand to stand spouting his guff to whoever would stand and take it.


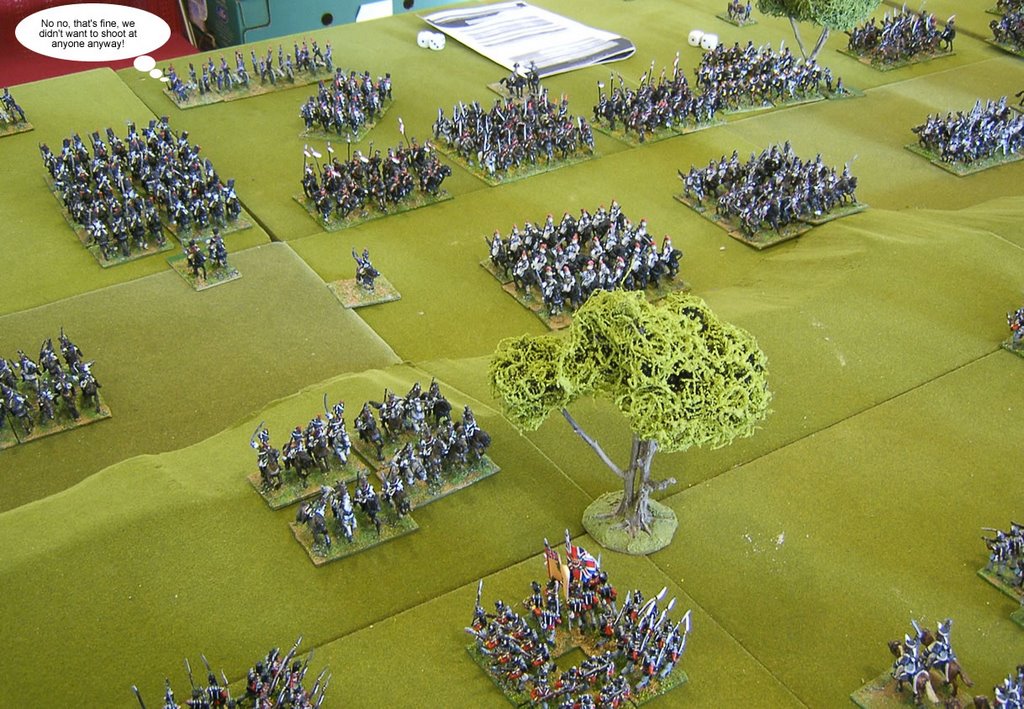
In terms of numbers, the biggest game there was this Napoleonic slugfest, I'd guess a thousand figures. To my mind deployed more like a parade than a battle, but impressive.

Sunday, November 26, 2006

Vikings

As promised, some shots of the Warhammer ancients game I ran to show a chap the rules in the week.

2000 points of Danish mainland Vikings worked out as follows:

General and Army standard accompanied by a unit of 30 Hirdmen with mixed weapons and 2 hidden Besirkir

32 Bondi with mixed weapons

32 Bondi with mixed weapons

18 Bondi with Bows

12 Ulfhendhar with Mixed weapons

24 Jomsvikings with Hand weapons

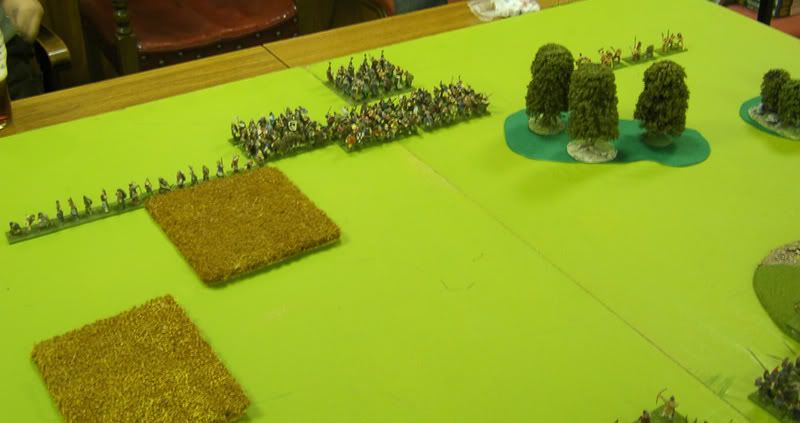
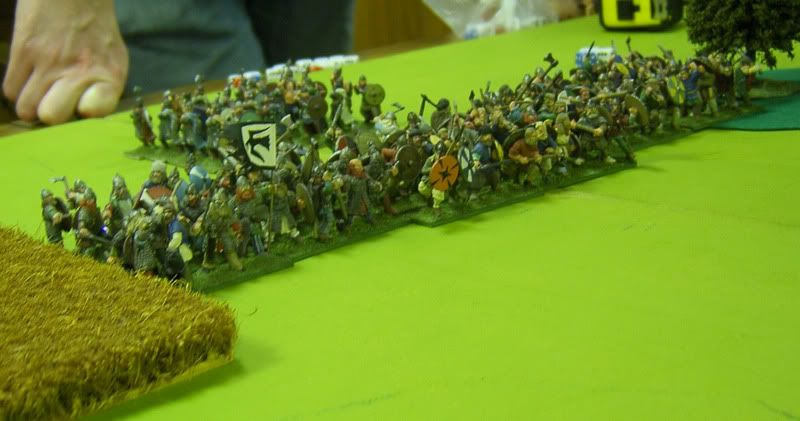
Here you can see their opening dispositions; a solid mass in the centre, with the Hird on the commanders' right, next to the bowmen and the Jomsvikings in the rear.


I neglected to get a shot of my own deployment, not least because the figures for my Frankish army were largely pooled from my selection of old saxon models and rear rank vikings. Figures painted some 20 years ago as a kid (and many homecasts too to boot!) and boy did it show; at least to me. I think the audience (this club always seems to have a good number of spectators, and I'm of the opinion that 28mm is a mysterious new scale to most of them...) must have been being polite when they praised the sombre and realistic colour schemes of my troops. Sounds like a polite way to say 'they're badly painted, aren't they!'

Anyhow, the Ottonian Frankish army was based as the vikings on one of the Shieldwall sublists - in this case the Flemish list:

General and Army standard with a unit of 7 Milite horse

9 Milite horse

9 Milite horse

24 Milites, dismounted Representing the Thuringians, who though armed and armoured as milites, tended to fight on foot.

24 Liberi foot

24 Liberi foot

8 Coloni bowmen

8 Coloni bowmen


At first the Vikings were tied down by the narrow field of deployment they had; Their advance was reduced to a crawl, except for the Ulfhendhar on the left. However I was more concerned with crashing my cavalry into his flanks and, to ensure all the possibilities of the rules were investigated, a frankly insane frontal charge against his massed line.

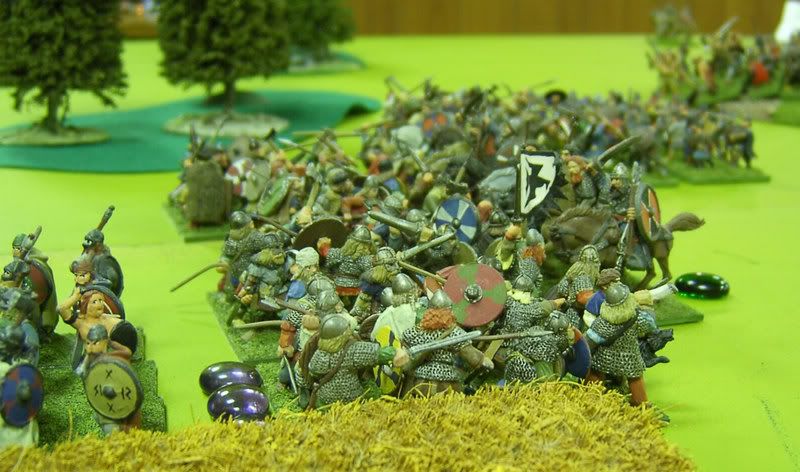
About the same time his Ulfhendhar tried to smash a unit of Liberi on the hill, but their shieldwall held and the remants of the wolf warriors were caught and wiped out. Although in the centre I delivered a juddering blow to the Vikings they held, and the double handed axes in the line sent horse and man to the ground; the cavalry broke like a wave on the prow of a longship. Worse still on the flank my charge against the Viking bowmen was lost before it even made contact; shot asunder on the way in.


However, with my right flank cleared, I was able to come down from the hill, and got my infantry to the fore. Here the spears sung a song of blood (ooh, getting very warhammer here now aint it!) the Vikings could not raise a voice to. One bondi unit scattered, the other was killed where it stood, but it was a high water mark for me. Momentarily it looked as if the Vikings were lost, but their Jarl ruled his hirdmen with spirit and skill and drove the Thuringians into the ground.

At the end the vikings had their best two units holding the field with their valiant bowmen still peppering my surviving cavalry, and one unit they could at least hope would rally. I could only count on my lords' cavalry, one unit of Liberi and one scattered band of coloni, trying to trade shots with the Danish bows.

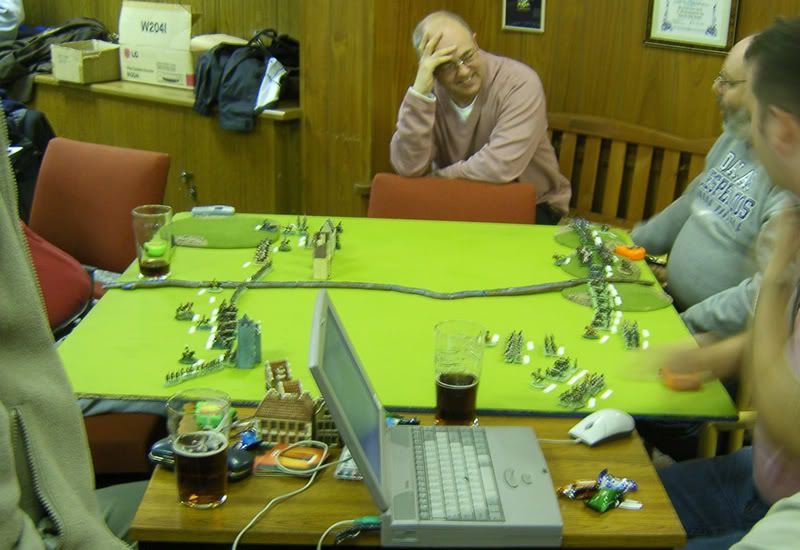
For a change I had time to grab a couple of shots of the other games on that night too. There seemed to be a reasonably healthy turnout on the night, 16-20 players and hangers on. Below is some sort of computer moderated napoleonics game, not my personal cup of tea (15mm, needs a laptop to play, didn't see anything move or any dice get thrown) but seemed to support a number of players.


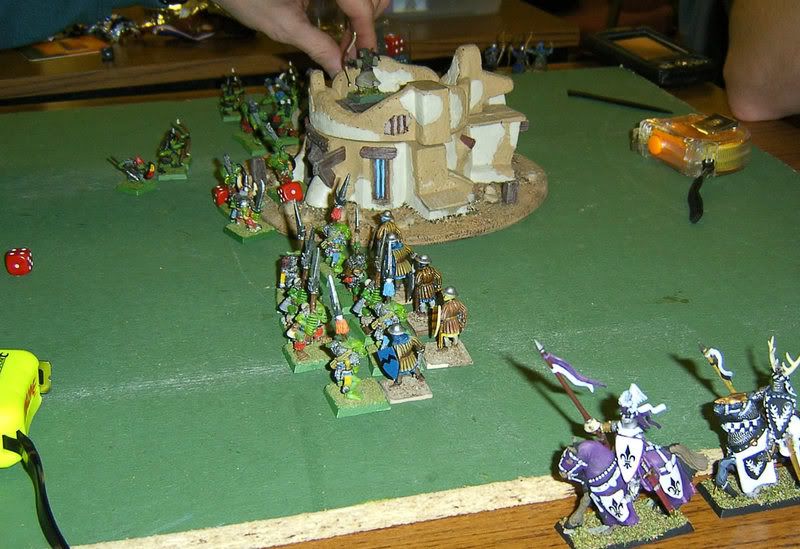
Two other guys were doing Warhammer skirmish, Orcs trying to capture a Brettonian watchtower.


All in all another good evening.

Next time, I think I'll roll out the 28mm WW2 and the Operation Overlord rules, by Alto Zero. I think I've done enough ancients of late.

Monday, November 20, 2006

AK47 Republic

A game at short notice, resulted in AK47 being dug out again at my house. Having amassed a huge collection of models and figures I let my two players select their own armies to any form the rules allowed; the end results being a Dictatorship, and a superpower backed state.

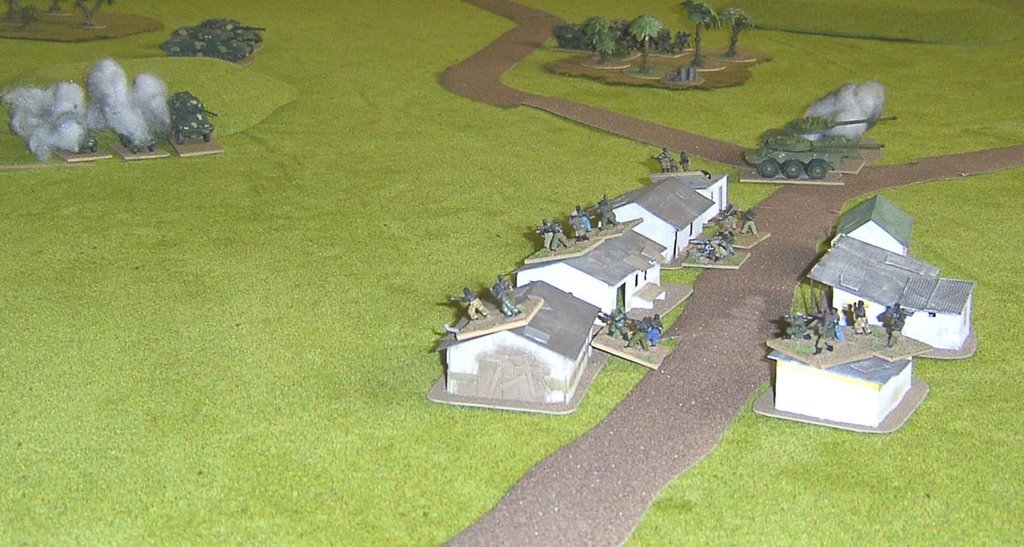
Chris' natural instincts for modern games saw him on the aggressive side with a force of armoured cars, tanks and mechanised infantry at the start. Phil, more at home with ancients and napoleonics, set himself a defensive task, initially equipped with tanks and militia troops holed up in and around a village.


Chris' flanking infantry captured one objective unopposed, but in the centre the armoured battle seemed to swing in the favour of Phil, who destroyed three afv's for the loss of only one of his own.


Reserves began to flood in as time ran out, Chris had well equipped and determined infantry arrive to the south of the village; Phil had truck-borne regulars move to intercept them. However in a tactical blunder the lorries were caught in the open, battered by fire and then obliterated by a close assault, the last defending tank to the north was destroyed, and in the end only the militia held out in the village.


By the terms of the rules it was a crushing victory for the attackers under chris. All in about two hours.


With time on our hands we even managed to fit in a came of cards, Nuclear War that is; a morbidly fun game in which the last man standing is not so much the winner as least defeated. you quickly get into the psyche of trading shots of ICBMs and attacks by stealth bombers with one another. How this hasn't been converted to a Collectible game overthe years I don't know.

Got a 2000 point a side game of WAB coming up on Wednesday; Danish Vikings versus Ottonian Franks; hopefully pictures to follow...