Monday, February 29, 2016

The Battle of Braddock Down - Part One: the Scenario


Hey folks,  it's finally time for another historical refight on the blog, and as is my preference it is for a smaller and arguably more obscure engagement, this time from the English Civil Wars.

Truth be told it would almost be disingenuous to call the historical outcome of Braddock Down, 19 January 1643, a battle.  The actual engagement was about as brief and one sided as you could ask for; but with a little more resolve it need not have been so one sided, after all both sides were of roughly similar sizes and the weaker Parliamentarian forces were at least deployed and ready when they sighted their foe.

The battle such as it was is well described in the slim volume 'The Civil War in the South-West' by John Barratt

   
One of the royalist commanders of the day, Sir Bevil Grenville noted "Sir Ralph Hopton resolved to march over to them and leave all to the mercy of God and valour of our side...[The Parliamentarians] courage failed them as they stood not our first charge of foot but fled in great disorder."  but could it have been otherwise.  Other reports suggest an attack in the rear by local clubmen may have helped the parliamentarians along, but they had at least begun the day well ordered and presented.  so what went awry?

Portraying the battle

This is the sort of small engagement that should be within the ability of any reasonable collection of models to represent in some way; Lutzen or even Naseby this ain't!  A total of around 9,000 men were engaged on the day and as the map below will show, the battlefield was a small one and easy to represent on table.  The first major issue would be selection of rules and you will all have your favourite, but I've chosen mine, Black Powder.

Now straight away, you may say 'but these don't cover the English Civil War! surely Pike and Shotte would be the obvious choice if you are going to use Warlord Games' rules?'  You may think that, but I personally dislike their application of companies of pike and shotte operating loosely - quasi-independently - of one another.  Black Powder does not permit such liberty, and all that is really missing is some allowance for the weapons and tactics of the period.  I keep this to a bare minimum, and so add a couple of extra rules, the most complex being the 'Stand of Pike' which replaces 'Form Square'
  • 'Stand of Pike' units within which at least 1/3 are armed with pike, may form a stand of pike.  This may be done as an ordered manoeuvre, or as an initiative action during a players own turn, or may be attempted as a reaction to a threat of a charge during the opponents' turn, for which the unit must pass a command check.  If successful the unit withdraws it's muskets behind the pike bases, to whatever facing is deemed appropriate.  the facing of the pikemen remains the same.  A unit in SoP may not move, except to wheel on the spot around its' centre once per turn upto 90 degrees.  A SoP may only fire with once dice, to its' flank arcs.  units charging the SoP lose their charge bonus and must beat the unit by a clear 2 point margin (casualties, support etc) to force a break test.  A SoP loses all melee benefits if charged from the flank or rear, and a unit may not form a SoP if reacting to a charge from the flank or rear.  Unlike in later periods, cavalry will always at least try to charge an SoP.  Units failing to form a SoP as a reaction roll to a charge will instead be placed in disorder before rolling for combat.
Additionally
  • Certain Parliamentarian cavalry is considered Unwilling to Charge.  These suffer a -1 command penalty if issuing charge orders.
  • Artillery does not have the luxury of quality limbers, mainly pulled by plough horses and oxen.  Therefore all movement is at the manhandled speed at all times
As the game was played in 15mm, the rules were scaled down to centimetres, which makes a 6x4 foot table more than enough for the whole battle.  A four foot square space would well serve  if pressed, though modification to the reserve timing of the artillery (see below) would then be advised.

For the army lists a standard notation of the commander (his command level and any traits applied) followed by the units under his command is used.  for units the four key stats in the rules - Hand to Hand, Shooting, Morale and Stamina - are given in brackets in that order, followed by any special notation and the recommended number of bases.  Cavalry have pistols and infantry musket and pike unless specifically noted otherwise.

Some gaps remained to be filled so far as the commanders of the day, but I've tried to reflect the forces of the battle as best I can, whilst at least intending to make the battle one either side could win...

The forces: Royalists

From Somerset gentry and with some experience from the Thirty Years War to fall back upon, Hopton had flashes of brilliance but was if anything an overrated commander.  His army however was undoubtedly the better of the two in the field on that day, formed around a core of veteran infantry.

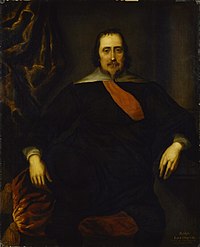
Sir Ralph Hopton
(being Royalist, he's indulged in a full portrait)
Ralph Hopton Commander in Chief (command: 8; traits: aggressive)
  • Hoptons Buffs (7/-/4+/3) +1 cavalry shock in melee resolution, 6 stands
  • Horse (6/1/4+/3) +1 shock, 6 stands
  • Dragoons (5/1/5+/3) Marauder, Carbines.  6 stands
  • Forlorn Hope (3/2/5+/2) Skirmishers.  No pike. 4 stands
Sir Bevil Grenville (command:8)
  • Grenvilles Cornish veterans (6/2/4+/3) Tough Fighters.  4 Pike and 3 shot stands
  • Slanning's regt. (5/2/4+/3)  3 pike and 3 shot stands
  • Travanion's regt. (5/2/4+/3)  3 pike and 3 shot stands
  • Godolphin's regt. (5/2/4+/3)  3 pike and 3 shot stands
  • Mohun's regt. (5/2/4+/3)  3 pike and 3 shot stands
Lord Warwick Mohun (command:7)
  • 2 Saker cannon (1/3-2-1/5+/1).  Light cannon ranged.  1 stand each
The forces: Parliament

Col. Ruthven was judged a competent commander, but by no means a spectacular talent, his army was largely made up of his own Scottish troops with recent local recruits added.  His artillery was still on it's way to the battlefield...
Col. William Ruthven
(being Parliamentarian, he can afford only an engraving)

Col. William Ruthven Commander in Chief (command: 8; traits: none)
  • Ruthven's first Scottish (5/3/4+/3) 2 Pike and 4 shot stands
  • Ruthven's second Scottish (5/3/4+/3) 2 Pike and 4 shot stands
  • Ruthven's third Scottish (5/3/4+/3) 2 Pike and 4 shot stands
  • Cornish militia (4/2/5+/3)  Wavering.  2 pike and 4 shot stands
Col. Carew (command:8)
  • Carews first troop of Heavy Horse (7/-/4+/3) +1 cavalry shock, 6 stands
  • Carews second troop of Heavy Horse (7/-/4+/3) +1 cavalry shock, 6 stands
  • Carews first troop of Light Horse (5/1/4+/3) Marauders, Unwilling to Charge, 6 stands
  • Carews second troop of Light Horse (5/1/4+/3) Marauders, Unwilling to Charge, 6 stands
Sir Shilston Carmedy (command:7)
  • 2 Demi-cannon (1/3-2-1/5+/2).  Heavy cannon ranged.  1 stand each
  • 1 Culverin (1/3-2-1/5+/1) Light cannon ranged. 1 stand
  • Guards of the artillery train (3/2/4+/2) Skirmishers.  4 stands
Note that Carmedy and all his command begins the battle in reserve on the Liskeard road, and will not appear until turn four.

Also be aware that for both sides their commander in chief also has command of a brigade, this being such a small battle you may wish to ignore the Black Powder rule that ends the players order issuing if the CinC fails a command check, rather treat him in this case as the same as any other subordinate general.  The forces are limited enough already.

The Battlefield and Initial Deployments

Download full version from the Battlefields Trust: HERE

The battlefield for the game is relatively simple, playing essentially across a gentle fold in moorland, with both armies beginning the battle on gentle rises, neither of which will confer any defensive advantage.  Middle Top House sits on the Liskeard road and has some small field enclosures associated with it which Hopton made use of.  Marshland fills the depression on the moor, and impinges upon the deployment of the Parliamentarians, arguably protecting their flank.  The marsh should be considered difficult ground for any entering it.  Fields are to the Parliament rear into which some troops were still deployed, though from accounts certainly not the Cornish who presumably were put in the front line to stop them drifting away.  Woodland is to the rear of the Royalists.

Deployment at least for the most historical play should emulate the map below; if tried a second time players may wish to deploy freely however, to see if they can do better than their gentlemen of the day...

Royalists to the right, yes, technically that's upside down.
In 15mm scale terms the two armies are about 60cm apart at the start of the game, for faster play you may wish to close the gap, but I do not recommend shortening the space to less than about 40cm, else there will be little to no manoeuvre!  Carmedy's artillery is placed on the Liskerad road behind the Parliament deployments in line on turn four, from turn five it may receive orders.


And so as it's getting late and this has actually become rather a long feature.  We'll leave it there.  Up next, what happened when we actually played out the scenario ourselves.


Friday, February 26, 2016

Robots and Rebel Scum!


It's not been easy to arrange a game of Imperial Assault for a long time now, largely as huge swathes of my weekends are devoted to study.  But to help keep in touch at least, I decided to dip into the box of miniatures for a quick painting fix that wouldn't intrude on assignments, which led to a handful of Star Wars models being finished.

First of all one of the Blink and you'll miss him bounty hunters that gained a second life in the books and comics; IG-88

"...if I only had a Heart..."

Oh he's on screen in Empire for what? fifteen seconds?  And you never see his lower half.  As with all my models to date though, I went back to trawl for stills from the original movies or production shots to decide on the paint scheme.  A 50/50 mix of gunmetal and copper gave a nice authentic dark burnish to the metal.  As you can imagine this was not a particularly taxing model to paint!

 The brass torso pistons are a little off script but it needed something just to give a little definition.  The orange 'headlights' are on the money though.

Not wanting to just at to the villains of the piece, I also cranked out a set of Rebel troopers:

Pew, pew, pew!
Canonically, you will of course know that these are in fact troopers operating in the Rebellion Navy, as seen at the start of A New Hope.  I don't think I'm going to blow anybody's nerd mind with that information.  The fantasy flight art shows the uniform much bluer than this, but again going back to restored source photo's it was clear the shirts were more of a grey.  I think these are still too blue, but they look the part.

On a Star Wars theme as we are today, I of course saw the Force Awakens back a few weeks.  I for one loved it; yeah it does rather retread elements of the first movie, but I feel it was 'destined' to do so, in part to show the cyclical nature of the ways of the force, but also to make it perfectly clear that we weren't going to have to endure three hours of CG trade negotiations.

It certainly went a long way towards washing the bitter after taste of the prequels out of my mouth.  I had the dubious fortune to watch (half heartedly with the sound off at a dinner party) the Prequels on a 4K tv recently too; and oh boy, have they aged badly!  The visual effects really do not stand up in a digital screen environment, cinema quality computer effects of just over a decade ago now look like cut scenes from a PS4/XBox One game.  Given the acting for the most part is flat and wooden these three films have nothing much left to commend them.  By comparison the mainly physical effects of episode seven felt like a breath of fresh air.

Enough ramblings about movies though, this is a gaming blog.  Plus I have work to do, on a Friday night.... wooo.

Sunday, February 21, 2016

French Ligne in training


When assembling Victrix French infantry is what you do for relaxation, you know your day must have been stressful.  They are anything but simple to assemble.  Still by comparison to 5-6 hours of Data Warehousing 101 this was a breeze.

I gathered together the various oddments I had lying around to build another regiment of infantry.  This took a good two and a half hours but the results show promise:

A relaxed March
 This is best described as a non-regulation regiment, whose Colonel clearly has taken his time in the Iberian peninsula as an opportunity to present his men how he feels they should be, Voltiguers with tall plumes and Grenadiers in bearskins.

Remaining numbers of miniatures meant that to avoid using kneeling figures, something I'd rather not do in isolation, I needed to convert a mounted commander.  Fortunately the Perry cavalry sets provide decent numbers of spares and I was able to do some careful carving to mate a Victrix officer figure with a set of Parry cavalryman legs and horse.

Front Quarters
 Other than his casual disregard for holding reins on a rearing mount, I think this looks pretty good.  A little filling and shaping on the coat tails won't go amiss when everything is dry however.

You can see his crack(s) from here
All this completed I ran a quick audit and found I also have a full unit of Legere and a unit of Grenadiers to put into the painting queue; not to mention a regiment of Dragoons, a battery of Guard artillery, various skirmishers and a few commanders.  When I'll get to all those is anyone's guess but after a few small interlude jobs I think more French infantry are definitely on the cards.


Monday, February 15, 2016

More rebasing, and some new painting


So having seen the Goblins get the thrashing no sane man would have failed to predict, I got back to the rebasing of my Orcs for KoW.  We've already seen the outcomes of this last month, but having spent my time hacking and not painting I decided to dig out some actual models that had malingered in a box of dreams (unemployed miniatures) for many a year.

A part of my WFB Orcs and Goblins army had been a small unit of Savage Orcs, really too small to be much use except in tiny battles, as there were only 15 warriors and a Shaman.  Latterly only the Shaman saw much action.  However I had managed to gather a fair number of classic metal Savage Orcs via eBay over the years, who along with a few Harlequin primitive Orcs and a spare Troll would make up the numbers for a very decent horde in Kings of War.

Doing this meant painting 24 models, but I figured they were lacking in fancy uniforms and such so it wouldn't be too bad.  Indeed the painting was a fine task.

Cutting the asshats free of their GW slottabases, to place them on less intrusive plastic sabots proved to be a MASSIVE BALLACHE however.  The original models were some 20+ year old, and a couple snapped off their tabs without much pressure, meaning I had to drill new supports for them.  This coming after the agony of cutting out 40 odd psuedo-slottabases from plasticard.  I wonder why I inflict such torture on myself.  The shields were made in a similar fashion by the way.

Hours of Annoyance
 Once I'd got to that stage I really wanted the torture over as soon as possible, so although in keeping with the rest of my Orcs, the basing for the unit - four stands of 9 or 10 models - was done as quickly as possible.  No finesse.

The new models have a very obviously different skin-tone
I had by this stage given the old standard bearer a revamp with a new flag more in keeping with the unit - featuring a massive stone club and some pictograms.  The old models have a far more - military skin shade, one I abjectly failed to match in the new batch, but I don't have a problem with that, as most animals and certainly humans by comparison, show an enormous range of skin variation.  fter some initial unwillingness I also added blue war paint to the unit.  It seemed appropriate, and suggested the colour for the unit's mascot:
Classic GW trolls are just the best
Here we see a very stinky Ogre, Known as Donald to the Orcs.  Blue is one of the very easiest colours to highlight using simple dry-brush techniques, which is all that's going on here.  I'm normally no fan of unit fillers, swapping out figures for gravestones, trees, standing stones and the like is cheating in my mind.  But I think this is and certain other infantry additions (I'm using my old Goblin Fanatics inside units to give the models a purpose) acceptable.  In my mind the Troll is certainly worth in heft the two Orcs I didn't have for a full horde!

Well, I'm glad these are done, and having rebased some 250 greenskins in the last month or so I feel it is time to let this project rest for a while, and turn my attention to less gruelling activities.

That and the Masters Degree....


Sigh


Sunday, February 14, 2016

The Battle of Hellfire Hill

I recently began to keep a games diary, I had purchased a nice leather-bound notebook on holiday last year and needed a purpose for it, so it seemed like an acceptable idea.  It was a good idea, as it helped me recover what little I can now recall about this Kings of War game I had with Ross at Xmas.

The game was a rematch, given that my Orcs had solidly beaten his Ogres in our previous encounter; but we agreed to enlarge the game as well and up the points to 3,000.  I also then decided, perhaps rashly, that as my Goblins had been the star players of the previous game, I would see if it was possible to build an army from my collection mainly comprising those snickering guys rather than the bigger boys.  With some inventive troop selection and scraping together virtually every model I had ready; it proved to be possible, and as we deployed Ross beheld the scale of a largely Goblin-led army of more than 300 models...

That's a lot of Goblins
 Though to be fair, 3,000 points of Ogres looked pretty fearsome too:

Stay tight lads
 As is clear both armies have learnt the lessons of previous encounters and look to protect their lines by forming in depth.

Like a Greek Phalanx, kinda
 The battle itself would be a simple one with no complex scenario requirements.  The Ogres deployed mainly behind a hill, but were soon necessitated to advance over it, leaving them open to my massed shooting.  The first Goblin round of missilery destroyed an Ogre unit in short order, whilst my cavalry got the better of the enemy scouts.

'Ave it!
 Soon the Goblins were looking to turn the flanks of the Ogre army.

 
 This would prove to be the highpoint of the battle for the Goblins.

 
 The Ogres continued to march, using heroes and small isolated units to cover their flanks.  The central horde smashed into the Goblin lines, and unlike previously, a collapse began.

Ooerr, these spears ain't gonna do much.
 The guts of the Goblin army were soon in tatters.  Their limited numbers of Orc allies had proved less than helpful, and they were relying on a gint to cover not only their flank, but their rear.

Where's backup Dammit!
 The second line braced for impact, hoping the worn Ogre front line was spent.  But it was not to be.

Doomed!
The battle had become a rout.  With only a handful of troops left I conceded at the end of my fourth turn, knowing the was no coming back from the parlous state my ragtag collection of troops was in.  

This was a fun, but very one-sided game, with the goblins never seeming to make their numbers count.  You can never underestimate the hitting power of the Ogres though, and it is certainly for this reason as much as any that I had to speedily accept defeat.

Maybe my diary should become a Book of Grudges...