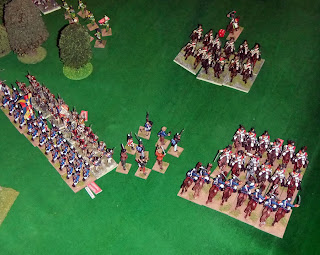
So finally, after much delay I write about the engagement at Sabugal - as refought between myself James, and Martin as the fiendish French. First of all a wide shot of the battlefield and the initial deployments of the French of Reyniers Division:
Reynier/Martin's orders were to delay any attack by Wellington across the river Coa, which was known to be fordable to their front. He held the high ground in some force, but knew he only needed to buy time.
The orders for James, controlling Beckwith and Drummond's brigades, were to attack the rear of the enemy line simultaneously with the assault be Picton/myself across the river. However, as in the actual battle, the weather resulted in an ill coordinated and badly placed attack by the British; Beckwith's brigade arrived alone and out of position in some fields below the wooded hills.
In the early mists only the rifle company identified targets, of a dispersed battalion of Leger, and a small firefight ensued. At this stage the French seemed to see the attack as a minor diversion and initially were satisfied that their skirmishers could deal with the problem. But when Drummond turned up with two more battallions and two squadrons of cavalry, he quite reasonably felt his flank was under considerable threat, and began to move both his infantry regiments and artillery to the left.
Even with Drummonds arrival the British were heavily outnumbered, and despite the weather they could have easily thrown the Allies back by exerting their full force against them.
The British began to advance across their front, hoping to catch the french before they were ready, but the cavalry failed to catch the French square on the edga of the woods off guard, and skirmishers held the infantry in the centre. The French were no less confused, but managed to bring forward their cavalry, even if their guns seemed mired atop the hill.
In the woods, Martin - true to form - issued orders to throw the British back, but blundered (with an 11 - due to the fog) instead. The result of the blunder saw them dash forward rashly, and although making contact with the thin red line, it delivered a savage volley at point blank range in the fog; splintering man and tree alike. The British issued the hussar and bayonet finished the French resolve.
Elsewhere the British cavalry rashly approched the French cavalry, who outnmbered them somewhat. Coming up short the French were able to counter charge and use their full force against only the Kings German Legion, destroying it as a fighting force.
At about this stage Picton finally arrived with the 3rd Division main force:
The Allied plan to this stage had worked, for having seen no other attack develop for an hour Reynier had assumed now that the flank attack was the main thrust, and had begun to move his other brigade to the left. Some revision would be needed to block the larger frontal assault.
Covered by the French cavalry the line infantry attacked the Portuguese troops and sent them packing. But the Cavalry failed to achieve similar results and were not able to finish off the British.
Picton, either through difficulty with the river or reticence, failed to show any urgency in his attack, and the French were able reform, including bringing up their guns to a new position covering the woods and the river. Beckwith and Drummond were less and less capable of delivering more than feints to the enemy.
After some loitering however, and with the weather finally dry and clear, the British marched up the hill and began to isolate the defenders, laying fire into their right flank.
This was enough to allow them to close and try to deliver the coup de grace. The French on their part tried to bring reserves from the left. The largest engagemet of the battle featuring three Allied battalions against one began for control of the main ridge and the route to the soft underbelly of the French army.
Viewed from the British lines the final situation was clear. Limited success in the belated attack over the river had not secured enough of a hold on the ridge for Picton's force to brush aside Reynier. Seeing that Beckwith and Drummond were spent fighting forces, the troops of the Left were being rapidly redployed to the right. Although the French were bruised they were not knocked out.
And this the refight replicated the results of the historical engagement. Although tactically indecisive, the French had bought enough time for themselves to allow an orderly withdrawal of the rest of the army, thus earning them a strategic victory.
The special rules made this game (see the previous post for details), plus the fact that Martin and James didn't know which engagement they were fighting until after the battle concluded. I took the passive role of Picton, to allow for minimum interference, and he tried to adhere to that rather too literally to give the British a realistic prospect of a victory. Even against better odds than history presented the British struggled.
Overall a great refight. And one that's rekindled my interest in Napoleonics.


Now have read the AAR. Nice write up and suite of photos. Good job.
ReplyDeleteMay I suggest some "loose terrain features" to break up the green barren felt look. Just small items scattered on the tabletop and which can be moved about if a units passes through.
Loved the painted miniatures....excellent.
Michael as WR